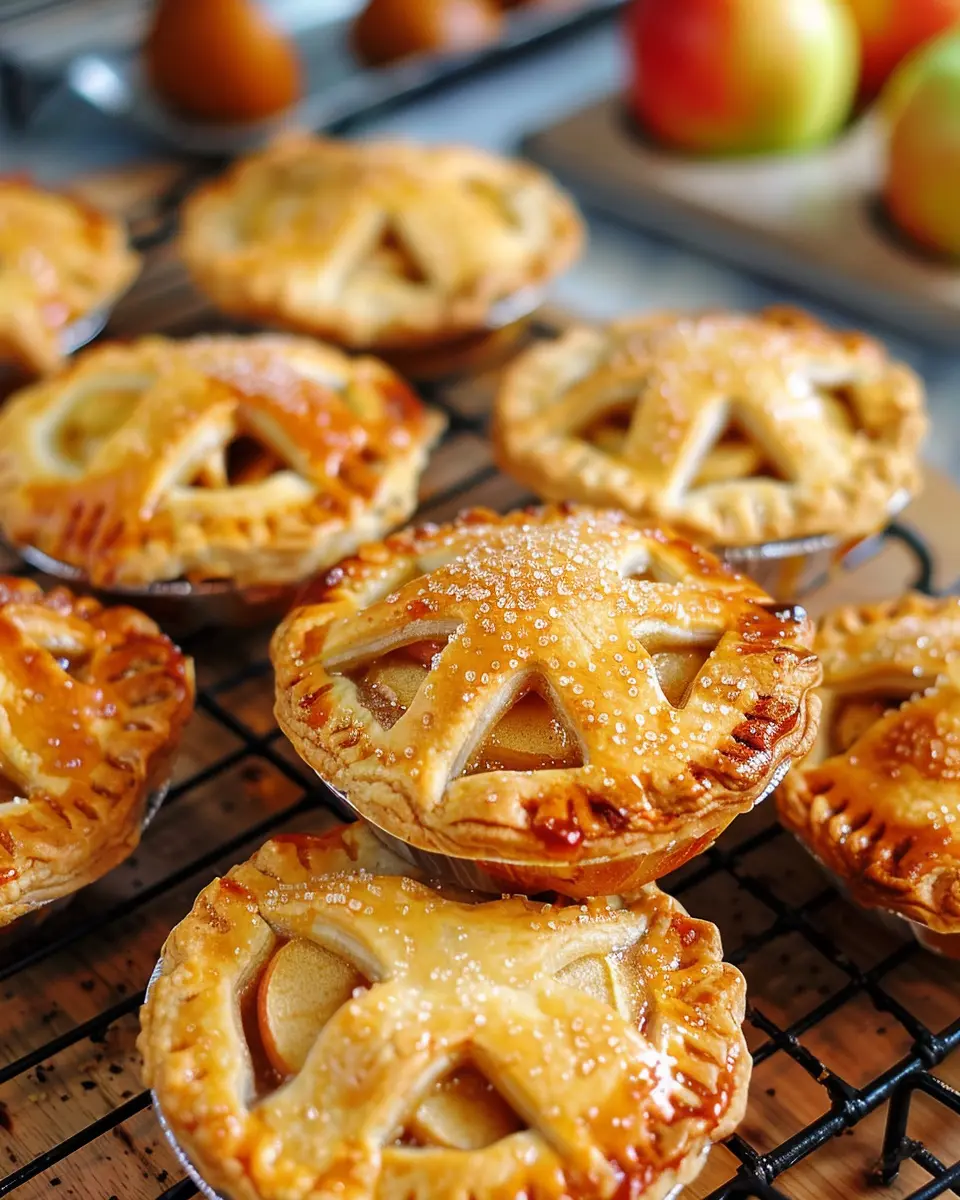
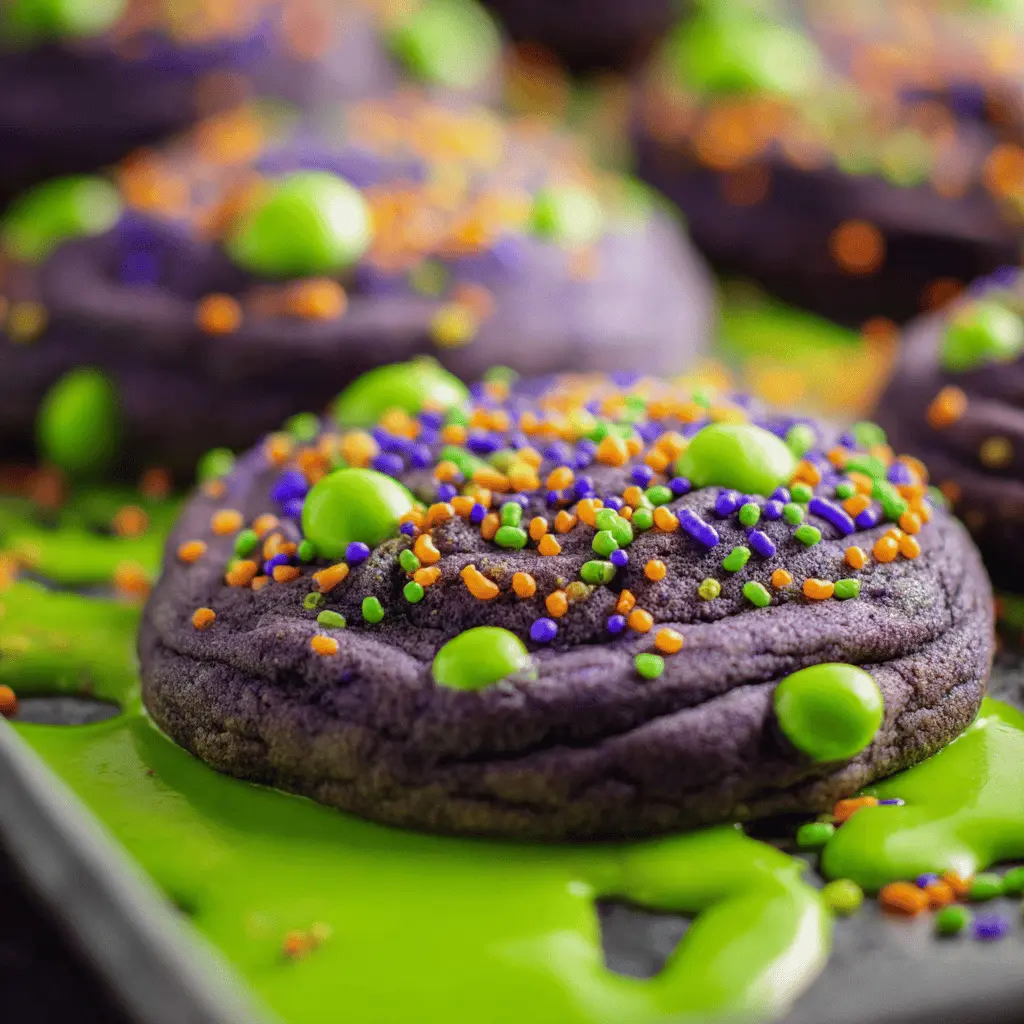
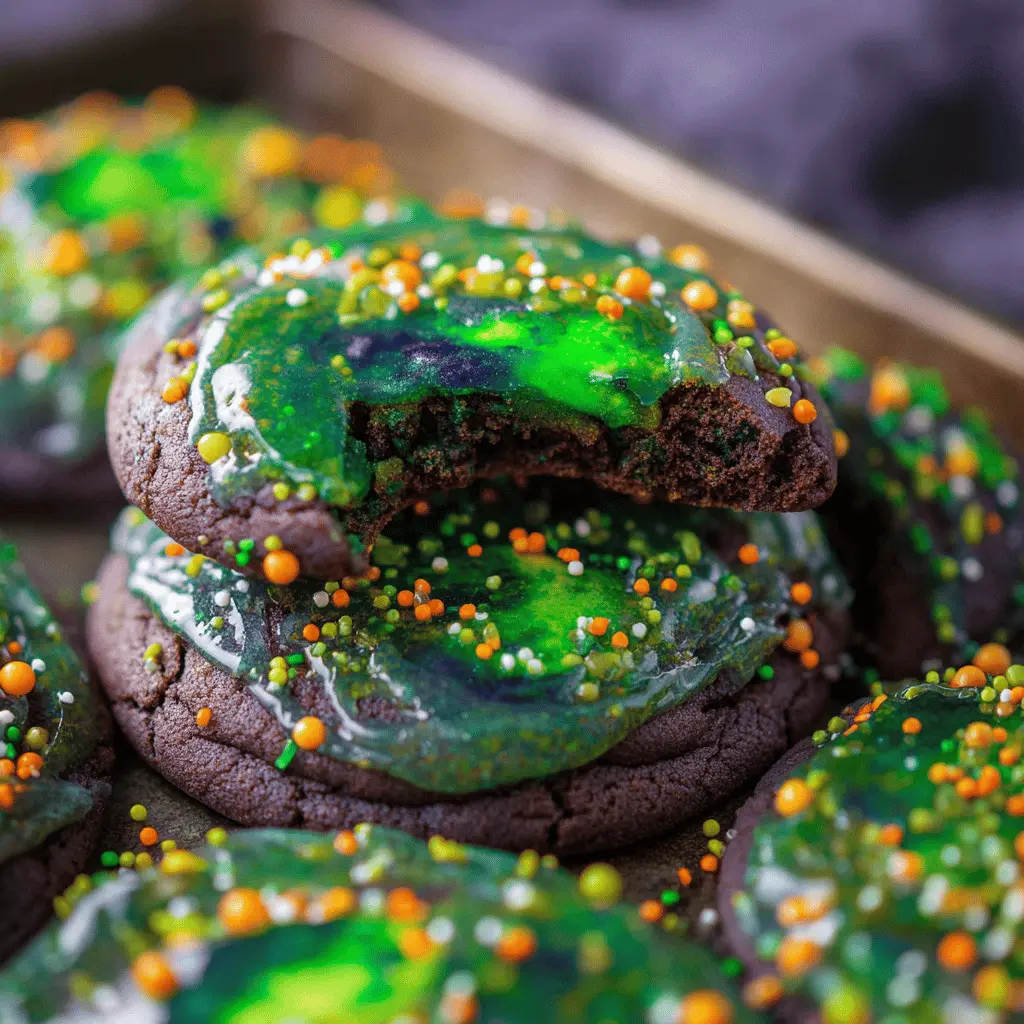
Introduction to Slime-Filled Halloween Cookies
Halloween is that magical time of year when pumpkins adorn our doorsteps, spooky decorations fill our homes, and the sweet scent of freshly baked treats wafts through the air. Speaking of sweet treats, have you ever heard of Slime-Filled Halloween Cookies? These delightful desserts not only capture the spirit of the season but also add an exciting twist to traditional cookie-baking. Imagine biting into a soft, chewy cookie only to have a burst of colorful slime ooze out—what’s not to love?
Why Halloween Cookies Make Celebrations Sweeter
Halloween is all about creativity and fun, and what better way to express that than through baking? Aside from indulging your sweet tooth, creating these Slime-Filled Halloween Cookies makes for a fantastic bonding experience with friends or family. Picture yourself surrounded by laughter, mixing vibrant colors, crafting gruesome (yet delicious) slime, and sharing this joyful activity with loved ones. It’s not just about the cookies; it’s about the memories you’ll create together.
According to the American Bakery Association, holiday-themed baked goods increase in popularity during autumn, making this a prime time to get into the kitchen. Whether you plan to wow your guests at a Halloween party or treat the neighborhood kids, these cookies will surely make your celebrations even sweeter.
The Allure of Homemade Halloween Treats
Homemade cookies have that special charm and warmth that store-bought treats simply can’t replicate. You have full control over the ingredients—like swapping out unhealthy items for more wholesome alternatives. With Slime-Filled Halloween Cookies, not only do you get to choose the colors and flavors of the slime filling, but you also have the opportunity to make them cater to various dietary preferences, ensuring no one misses out on the fun.
So why not dive into this whole new level of cookie innovation? Grab your aprons, unleash your creativity, and get ready to take your Halloween festivities to the next level with these irresistible slime-filled delights! Trust me; you’re going to want to share these spooky and surprisingly fun treats with everyone.
Ingredients for Slime-Filled Halloween Cookies
Creating the perfect treat for Halloween festivities? Let’s dive into the essential ingredients that will make your Slime-Filled Halloween Cookies a hit at every gathering!
Essential Ingredients for the Filling
To achieve that delightful, gooey center, gather the following:
- Green Gelatin: This gives your filling a vibrant color and a fun texture.
- Corn Syrup: A key component for a sticky, slime-like consistency.
- Food Coloring: Enhance the “slime” experience with neon green or eerie purple hues.
- Confectioners’ Sugar: To balance the sweetness and help thicken the filling.
Core Ingredients for the Cookies
Now, let’s focus on what forms the crispy exterior:
- All-Purpose Flour: The base for your cookie dough.
- Butter: Opt for unsalted to control the flavor perfectly.
- Sugar: Regular granulated sugar will give that classic cookie sweetness.
- Baking Powder and Baking Soda: Essential for achieving that light, fluffy texture.
- Eggs: They bind everything together and add moisture to your dough.
These ingredients are straightforward and ensure your Slime-Filled Halloween Cookies turn out deliciously festive! For more tips, check out baking resources like the Martha Stewart website or America’s Test Kitchen for expert advice.
Preparing Slime-Filled Halloween Cookies
If you’re looking to add a spooktacular twist to your Halloween festivities, slime-filled cookies are the way to go! These delightful treats not only look the part but also deliver an exciting surprise with every bite. Here’s a step-by-step guide to preparing these fun cookies that will impress your friends and family.
Create the Cheesecake Filling
The first step in making your Slime-Filled Halloween Cookies is preparing the cheesecake filling, which gives that yummy, gooey center. Here’s what you need:
- 8 oz cream cheese, softened
- ½ cup granulated sugar
- 1 tsp vanilla extract
- A few drops of green food coloring (or any spooky color you prefer)
Instructions:
- In a mixing bowl, beat the cream cheese until it’s creamy and smooth.
- Gradually add the sugar, mixing well until thoroughly combined.
- Stir in the vanilla extract and food coloring until you achieve a vibrant slime color.
- Once mixed, cover the bowl and refrigerate for about 30 minutes. This will help the filling firm up slightly, making it easier to work with later.
Mix the Cookie Dough
Now that your filling is chilled, it’s time to whip up the cookie dough. You want a dough that’s soft but firm enough to hold the filling. Grab these ingredients:
- 2 ½ cups all-purpose flour
- 1 tsp baking soda
- ½ tsp salt
- 1 cup unsalted butter, softened
- 1 cup brown sugar
- ½ cup granulated sugar
- 2 large eggs
- 1 tsp vanilla extract
Instructions:
- In a bowl, whisk together the flour, baking soda, and salt.
- In another large bowl, cream the butter, brown sugar, and granulated sugar until light and fluffy.
- Add the eggs one at a time, mixing well after each addition, followed by the vanilla.
- Gradually add the dry ingredients to the wet ingredients, mixing until combined.
Chill the Dough
Chilling your dough is crucial for perfectly textured cookies. Cover the mixing bowl with plastic wrap and refrigerate for at least 1 hour. A chilled dough is easier to handle and produces a firmer cookie that holds its shape during baking. While you wait, why not explore some fun Halloween trivia or learn how to carve a pumpkin?
Assemble the Cookies
Now comes the fun part—assembling your Slime-Filled Halloween Cookies! Follow these steps for cookie magic:
- Preheat your oven to 350°F (175°C).
- Once the dough is ready, scoop out about 1 tablespoon of dough and flatten it in your hand.
- Place about 1 teaspoon of the cheesecake filling in the center. Make sure to keep it away from the edges for easy sealing.
- Encase the filling with the dough and roll it into a ball. Repeat until all dough and filling are used.
Bake to Perfection
Your cookies are almost ready!
- Line a baking sheet with parchment paper to prevent sticking.
- Place the cookie balls on the sheet, leaving enough space in between, as they will spread while baking.
- Bake for 10-12 minutes until the edges are golden but the centers are still soft. Remember, they will firm up while cooling.
After they’re out of the oven, let them cool for a few minutes before transferring to a wire rack. If you want an even more theatrical flair, drizzle with chocolate or sprinkle with powdered sugar.
Serve these cookies at your Halloween gathering, and watch your guests delight in the festive blend of flavors and textures. Happy baking, and may your Halloween treats be filled with fun surprises!
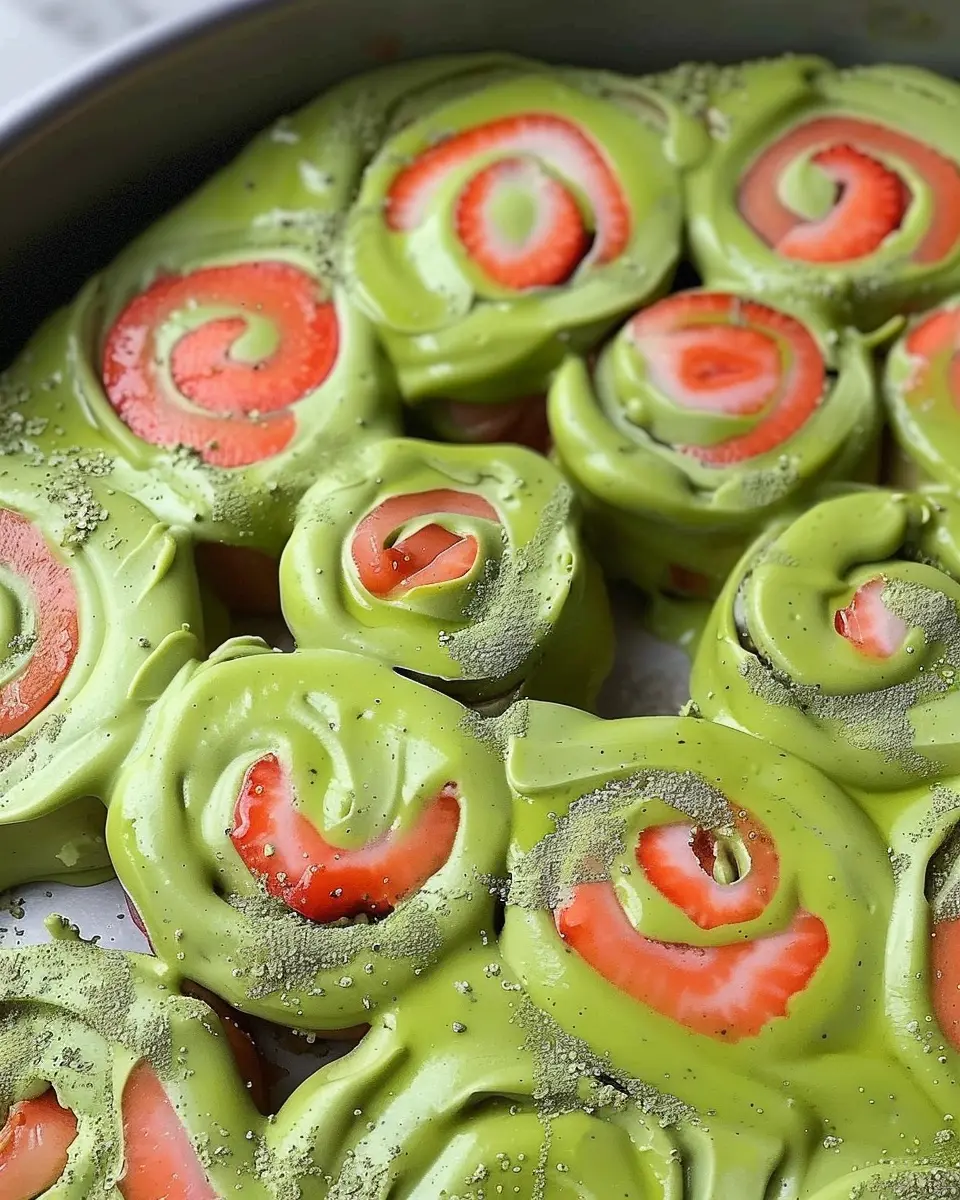
Variations on Slime-Filled Halloween Cookies
Different Flavor Fillings
When it comes to crafting the perfect slime-filled Halloween cookies, the sky’s the limit with flavors! While traditional fillings like gooey green apple or oozing raspberry are crowd favorites, why not try some unconventional options?
- Pumpkin Spice: Embrace the spirit of the season with a sweet pumpkin filling mixed with warm spices.
- Chocolate Mint: For a haunted twist, use a chocolate mint filling that mirrors the mysterious night air.
- Strawberry Lemonade: Bright and zesty, this refreshing blend adds a unique tang that will surprise your guests.
These alternatives not only delight the taste buds but also appeal to a variety of preferences. Plus, experimenting with flavors can lead to fun, personalized creations that your friends will rave about!
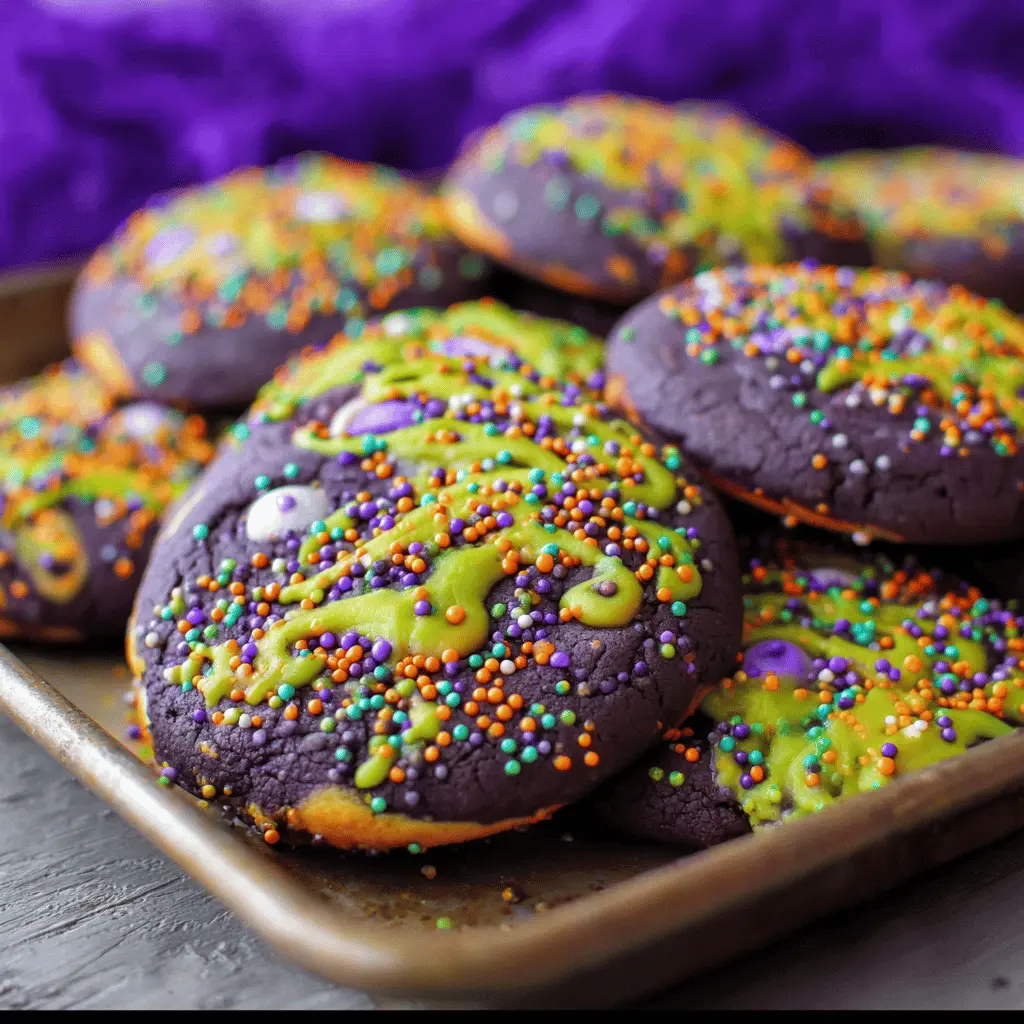
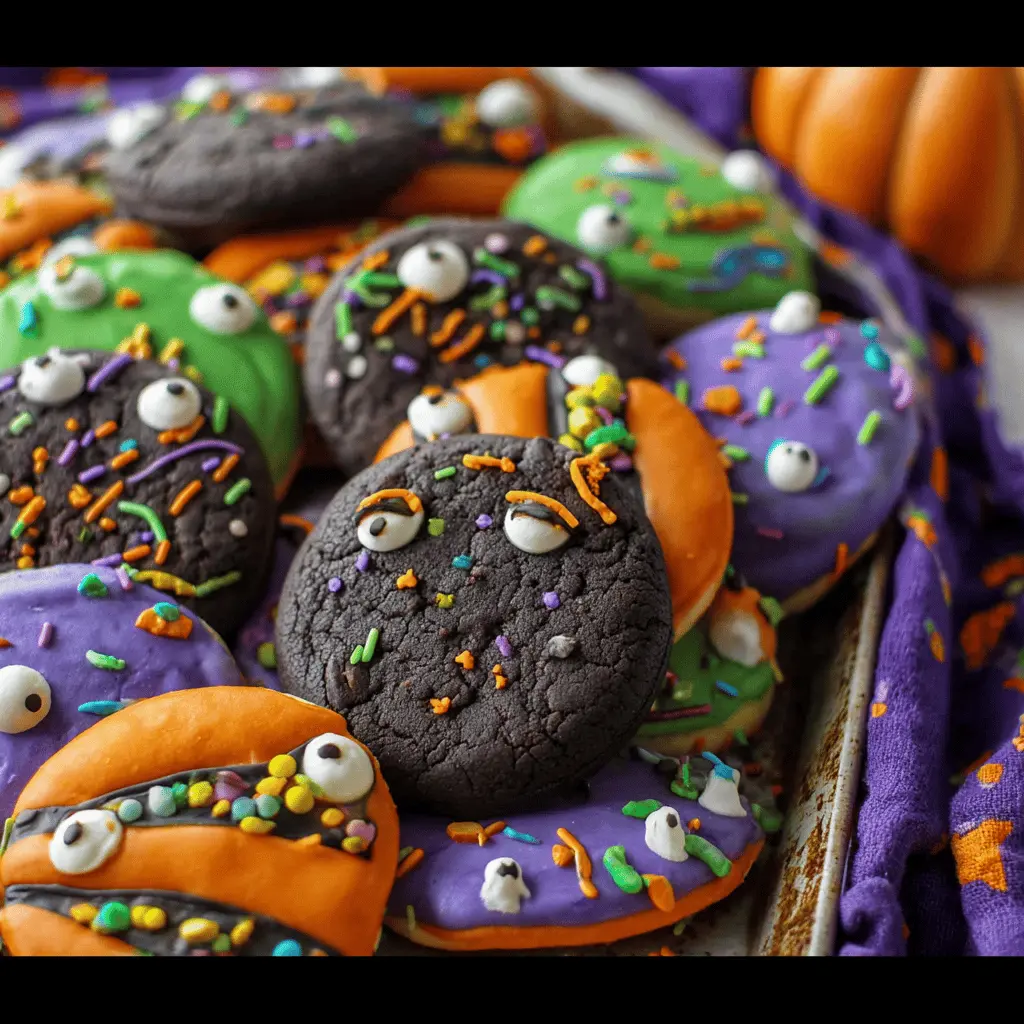
Festive Cookie Designs
Now, let’s talk design! The beauty of slime-filled Halloween cookies lies not just in their taste, but their appearance. Here are some delightful ways to turn your cookies into Halloween masterpieces:
- Spider Webs: Use melted chocolate to create intricate web designs on top of your cookies for a spooky effect.
- Cute Monsters: Shape your cookies into fun creatures and use colorful icing to decorate their features. Think googly eyes and fuzzy fur!
- Dripping Effect: Allow your slime filling to peek out in a way that mimics dripping ooze—perfect for adding that horror factor.
Don’t be afraid to get creative! A little artistic flair can elevate your Halloween treat from tasty to totally Instagram-worthy. Check out sites like Martha Stewart or Taste of Home for inspiration and decorating tips!
So, gather your ingredients and let your imagination run wild with these slime-filled Halloween cookies!
Cooking Tips and Notes for Slime-Filled Halloween Cookies
Common Mistakes to Avoid
When creating your Slime-Filled Halloween Cookies, be wary of these common pitfalls:
- Overmixing the Dough: This can lead to tough cookies. Mix until just combined for a more tender result.
- Not Chilling the Dough: Chilling helps the cookies hold their shape during baking. Give it at least 30 minutes in the fridge.
- Underbaking: It’s tempting to take cookies out early, but they continue to cook on the tray after removal. Aim for a barely golden edge.
Essential Baking Tools
To make your baking experience smoother, gather these essentials before starting:
- Silicone Baking Mat: Prevents sticking and makes cleanup a breeze.
- Cookie Scoop: Ensures uniform cookie sizes for even baking.
- Piping Bags: Perfect for filling your cookies with gooey slime, allowing you to control the flow.
Baking is all about having fun, right? If you’re looking for more tips or inspiration, consider checking out resources like King Arthur Baking or The Spruce Eats. Happy baking!
Serving Suggestions for Slime-Filled Halloween Cookies
Pairing with Beverages
When it comes to indulging in your Slime-Filled Halloween Cookies, the right beverage pairing can elevate your spooky experience. Opt for a refreshing apple cider or a vibrant pumpkin spice latte. Both drinks complement the sweetness of your cookies and introduce a seasonal vibe that resonates with Halloween. If you’re in the mood for something more fun, try serving them alongside colorful mocktails made with sparkling water and seasonal fruits—perfect for a festive gathering!
For more inspiration on mocktails, check out articles from Epicurious or Serious Eats that list great non-alcoholic beverage ideas.
Creative Gift Packaging Ideas
Thinking about sharing your Slime-Filled Halloween Cookies? Present them in a charming way! Consider using clear treat bags tied with spooky-themed ribbons, or decorate cookie boxes with Halloween stickers for a personal touch. These make great gifts for neighbors, friends, or even office mates who might appreciate a festive surprise.
You might even want to include a little note with your cookies, saying something like, “Caution: May cause spontaneous joy!” Being a little cheeky not only brings a smile but makes your treat feel extra special. Get ready to make cookies that bring people together and spread some holiday love!
Time Breakdown for Slime-Filled Halloween Cookies
Preparation Time
Getting started with your Slime-Filled Halloween Cookies is half the fun! You’ll spend about 20 minutes gathering your ingredients and mixing up the dough. It’s the perfect opportunity to put on your favorite Halloween playlist and get into the spooky spirit.
Chilling Time
Once your dough is ready, it’s crucial to chill it for about 30-60 minutes. This time helps the cookies firm up, making it easier to shape them without them spreading too much during baking. While you wait, why not plan the perfect Halloween movie marathon?
Baking Time
After chilling, you’ll bake your cookies for approximately 10-12 minutes. Keep an eye on them—once they’re golden brown at the edges but still soft in the center, they’re ready!
Total Time
All in all, you’re looking at about 1 hour and 20 minutes from start to finish. It’s a small time investment for a spooktacular treat that’s sure to impress your friends and family this Halloween.
Nutritional Facts for Slime-Filled Halloween Cookies
When indulging in Slime-Filled Halloween Cookies, it’s good to keep track of what you’re treating yourself to. These deliciously spooky cookies are not just a fun holiday snack; they’re also packed with various nutrients you might find surprising. Here’s a breakdown to keep in mind:
Calories
Each cookie typically contains around 150-200 calories. This makes it a fun treat that won’t derail your diet too much, especially if enjoyed in moderation.
Sugar Content
Expect about 10-15 grams of sugar per cookie. While they may satisfy your sweet tooth, consider balancing this with healthier options throughout the day. For more on sugar consumption recommendations, check out this article from the American Heart Association.
Fats
These Slime-Filled Halloween Cookies contain about 5-8 grams of fat each, primarily from butter and added chocolate. Choosing reduced-fat versions of ingredients can help lower this amount if desired.
Enjoying these cookies can be part of a balanced diet, so don’t hesitate to whip up a batch for your Halloween festivities! Just remember, moderation is key to a guilt-free indulgence.
FAQs about Slime-Filled Halloween Cookies
Can I make these cookies ahead of time?
Absolutely! One of the great things about Slime-Filled Halloween Cookies is that they can be prepared in advance. You can either bake the cookies a day or two before you plan to serve them or make the dough ahead and refrigerate it for up to two days. If you’re looking to save even more time, consider freezing the baked cookies. Just follow these steps:
- Allow cookies to cool completely.
- Place them in an airtight container or freezer bag.
- Layer them between sheets of parchment paper to prevent sticking.
When you’re ready to enjoy, simply thaw them at room temperature, then fill with your chosen “slime” filling!
How should I store leftover cookies?
If you manage to have any Slime-Filled Halloween Cookies left after your festivities, store them in an airtight container at room temperature. They’ll stay fresh for about three days. If you’re worried about them becoming too soft or stale, you can place a slice of bread in the container to maintain moisture without making the cookies soggy.
Can I substitute ingredients for dietary restrictions?
Yes, you can! If you or your guests have dietary restrictions, numerous substitutions can ensure everyone can enjoy these fun cookies:
- Use gluten-free flour for a gluten-free version.
- Try vegan butter and a flaxseed meal as an egg substitute for a dairy-free and egg-free option.
- If you need to lower sugar, experiment with natural sweeteners like monk fruit or coconut sugar.
For more detailed tips on substitutions, websites like Nutritiondata offer great insights into ingredient swaps that maintain flavor and texture.
Enjoy experimenting, and happy baking!
Conclusion on Slime-Filled Halloween Cookies
Final Thoughts on Enjoying Homemade Delights
As Halloween approaches, there’s something uniquely satisfying about whipping up a batch of Slime-Filled Halloween Cookies in your own kitchen. Not only do these cookies offer a spooktacular treat, but they also provide a fun way to engage with family and friends. Imagine the smiles when you cut into a cookie and that vibrant filling oozes out!
Creating these tasty morsels allows you to experiment with flavors and add your personal touch. Plus, using high-quality ingredients means you can control the sweetness and flavors for a delightful treat. So gather your friends or family, put on some festive music, and have a blast baking memories that are just as sweet as the cookies themselves. For more tips on Halloween baking, check out the resources from Taste of Home and Food Network!
PrintSlime-Filled Halloween Cookies: Easy and Fun Treats for All Ages

These Slime-Filled Halloween Cookies are a delightful treat perfect for kids and adults alike, combining spooky fun with delicious flavors.
- Prep Time: 20 minutes
- Cook Time: 12 minutes
- Total Time: 32 minutes
- Yield: 24 cookies 1x
- Category: Dessert
- Method: Baking
- Cuisine: American
- Diet: Vegetarian
Ingredients
- 2 cups all-purpose flour
- 1 teaspoon baking soda
- ½ teaspoon salt
- ¾ cup unsalted butter, softened
- 1 cup granulated sugar
- 1 cup brown sugar, packed
- 2 large eggs
- 2 teaspoons vanilla extract
- 1 cup green slime (or any desired filling)
Instructions
- Preheat your oven to 350°F (175°C) and line a baking sheet with parchment paper.
- In a bowl, whisk together flour, baking soda, and salt.
- In another bowl, beat the butter and sugars until fluffy.
- Add the eggs and vanilla to the butter mixture and mix well.
- Gradually add the dry ingredients until just combined.
- Take a tablespoon of dough, flatten it, and place a teaspoon of slime in the center. Fold the dough over and seal it.
- Place the cookies on the prepared baking sheet and bake for 10-12 minutes.
- Let the cookies cool on the baking sheet for a few minutes before transferring them to a wire rack.
Notes
- Your filling can be swapped with different colored slime for a fun effect.
- Ensure the filling is not too runny to prevent leaks.
Nutrition
- Serving Size: 1 cookie
- Calories: 120
- Sugar: 15g
- Sodium: 150mg
- Fat: 7g
- Saturated Fat: 4g
- Unsaturated Fat: 2g
- Trans Fat: 0g
- Carbohydrates: 18g
- Fiber: 0g
- Protein: 1g
- Cholesterol: 30mg
Keywords: Halloween Cookies, Slime-Filled Cookies, Easy Halloween Treats