
Introduction to Halloween Cookies
As the leaves change and the air turns crisp, there’s a certain magic that sets in around Halloween. This season invites creativity, playful spookiness, and an abundance of sugar—especially when it comes to baking! If you’ve ever wondered why Halloween is a fantastic time for whipping up treats, consider this: Halloween cookies offer an array of opportunities for fun, festive designs, and communal enjoyment.
The Perfect Time for Baking
-
Crisp Air and Cozy Vibes: Fall is the perfect backdrop for an afternoon of baking. The cooler temperatures make your kitchen feel like the coziest spot in the house. It’s the ideal excuse to turn on your oven and fill your home with warm, sweet aromas.
-
Fun and Festive Themes: Halloween is all about creativity! From spooky skeletons to adorable pumpkins, the designs you can create are endless. Why not try your hand at ghost-shaped cookies or vibrant, colorful icing that spells out eerie messages? The aesthetic possibilities are as limitless as your imagination.
-
Sharing and Community: Baking is not just about making something delicious; it’s about sharing joy. Halloween parties, office treats, or simple gatherings with friends and family provide the perfect opportunity to share your Halloween cookies. Plus, studies show that acts of sharing can boost your mood and strengthen bonds with others—why not sweeten those connections this Halloween?
-
Ingredient Exploration: Halloween baking allows you to explore different flavors and ingredients, making it an exciting culinary adventure. Think outside the box! Adding pumpkin spice, cinnamon, or even edible glitter can elevate your cookies from standard to spectacular.
Incorporating seasonal ingredients can also enhance your treats! Interested in researching great alternatives? Check out The Spruce Eats or Food Network for inspiration.
So, as you prepare to don your apron and start mixing, remember that Halloween cookies are more than just dessert—they’re a celebration of creativity, togetherness, and the joy of the season. Get ready to create delicious delights that will make your Halloween festivities truly unforgettable!

Ingredients for Halloween Cookies
Making Halloween Cookies is a delightful way to embrace the spooky season while showcasing your culinary creativity. To whip up these festive treats, you’ll need a selection of ingredients that create not only delicious flavors but also eye-catching designs. Here’s what you’ll need:
- Flour: Start with all-purpose flour for that perfect cookie base. This is essential for getting that lovely texture.
- Butter: Use unsalted butter to allow control over the saltiness; at room temperature, it’s easy to mix and ensures a soft cookie.
- Sugar: Granulated sugar will add sweetness and help achieve a crispy edge, while brown sugar brings a touch of moisture and depth.
- Eggs: A couple of large eggs will help bind the ingredients together.
- Vanilla Extract: This adds a warm, inviting flavor; make sure it’s pure for the best results.
- Baking Powder and Baking Soda: These leavening agents are crucial for light and fluffy cookies.
- Decorative Elements: Sprinkles, colored icing, and fondant can turn your Halloween Cookies into spooky masterpieces!
For tips on cookie baking, check out this guide on cookie decorating for inspiration!
Step-by-step preparation for Halloween Cookies
Making Halloween cookies is an exciting and spooky way to celebrate the season. With just a bit of preparation and creativity, you can whip up some delightful treats that everyone will love. Let’s dive into the preparation process!
Gather your ingredients
Before starting your baking adventure, it’s essential to gather all your ingredients to ensure a smooth process. Here’s what you’ll need for those delightful Halloween cookies:
- Flour: 2 ¾ cups
- Sugar: 1 ½ cups (you can substitute with coconut sugar for a healthier option)
- Butter: 1 cup, softened
- Eggs: 2 large
- Baking powder: 1 tablespoon
- Vanilla extract: 2 teaspoons
- Salt: ½ teaspoon
- Food coloring: In shades of orange, black, and green, if you want to add an extra level of festivity
- Decorative toppings: Sprinkles, edible glitter, or icing to create your spooky designs
As you gather your ingredients, consider heading over to Epicurious for more inspiration and ideas on how to customize your cookies!
Prepare your baking sheet and preheat the oven
While you’ve got your ingredients ready, it’s time to set the stage for cookie magic. Preheat your oven to 350°F (175°C). This will ensure your cookies bake evenly.
Next up, line your baking sheets with parchment paper. This not only prevents the cookies from sticking but also makes for an easy cleanup! You’ll need multiple sheets if you’re planning to bake a large batch, which is always recommended during the Halloween season — after all, who doesn’t want leftover cookies?
Make the cookie dough
Now, let’s get down to the fun part: making the cookie dough.
- In a large mixing bowl, cream together the softened butter and sugar until light and fluffy (about 3-5 minutes).
- Add in the eggs one at a time, mixing well after each addition. Don’t forget the vanilla extract!
- In a separate bowl, whisk together the flour, baking powder, and salt. Gradually incorporate the dry ingredients into the wet mixture.
- Finally, add a few drops of food coloring to create your preferred spooky shades.
After everything is mixed, give it a taste test (quality control is key)! Now, you might be wondering, what if my dough seems too sticky? A sprinkle more of flour often helps achieve the right consistency. Never hesitate to check Food Network for tips and tricks!
Shape the spooky cookies
Once your dough is ready, it’s time to let your creativity flow! Roll out the dough on a floured surface to about ¼ inch thickness.
Using Halloween-themed cookie cutters — think bats, ghosts, pumpkins, and witches — cut out shapes and place them on your prepared baking sheets. Leave some space between them, as the cookies will spread while baking.
For a fun twist, consider using a small paintbrush to dab edible glitter on top of the cookies before they go in the oven. It’s the perfect way to add a bit of sparkle!
Bake and cool the cookies
Time to bake your Halloween cookies! Place the baking sheets in the preheated oven and bake for about 10-12 minutes or until the edges are slightly golden. Keep a close eye on them, as ovens can vary.
Once baked, remove the cookies and allow them to cool on the baking sheets for a few minutes before transferring them to wire racks. This is essential for maintaining their shape and texture. While they cool, try to resist the urge to snack on them right away!
In no time, you’ll have a spooky platter of cookies perfect for sharing at your Halloween celebration. Enjoy the fun of decorating them with icing and sprinkles, and don’t forget to share your creations on social media! Happy baking!
And remember, if you’re looking for more baking tips or creative cookie ideas, check out King Arthur Baking for an extensive toolkit for your baking needs.
Variations on Halloween Cookies
Pumpkin Spice Halloween Cookies
There’s something magical about the combination of pumpkin and spice during the Halloween season. These Pumpkin Spice Halloween Cookies are not only festively delicious but also easy to whip up. Start with a basic sugar cookie dough, then stir in pumpkin puree and a blend of cinnamon, nutmeg, and ginger for that signature fall flavor.
Ingredients:
- 1 cup sugar
- ½ cup butter, softened
- 1 egg
- 1 teaspoon vanilla extract
- 1 cup pumpkin puree
- 2 ½ cups flour
- 1 teaspoon baking powder
- Spice mix (cinnamon, nutmeg, ginger)
Shape your dough into spooky cookie figures or simple rounds, then sprinkle with colored sprinkles for a pop of color. Bake until they’re just golden, and your home will smell like autumn!
Chocolate Chip Monster Cookies
If you’re looking to make Halloween Cookies that are a fun twist on a classic favorite, consider crafting some Chocolate Chip Monster Cookies. These cookies are packed with gooey chocolate chips, and you can add colorful candy-coated chocolates for a vibrant fright!
Ingredients:
- 1 cup brown sugar
- 1 cup granulated sugar
- 1 cup butter (softened)
- 2 eggs
- 1 teaspoon vanilla
- 4 cups oats
- 1 cup chocolate chips
- 1 cup candy-coated chocolates
Mix the wet ingredients and sugars until creamy, then fold in oats, chocolate chips, and candies. Shape them into monster-sized dollops on a baking sheet and bake until the edges are lightly browned. These cookies will not only satisfy your sweet tooth but will also be a hit at parties and gatherings.
Feeling inspired? Try these variations and consider checking out more Halloween-themed recipes at Food Network or All Recipes for endless creativity in your baking adventures!
Baking Tips and Notes for Halloween Cookies
Baking Halloween cookies is a fun way to celebrate the spooky season! Here are some practical tips to ensure your cookies impress both in appearance and taste.
Start with Quality Ingredients
Using fresh, high-quality ingredients like butter, sugar, and flour makes a difference in flavor and texture. Always check the expiration dates on your baking supplies, especially for baking powder and baking soda, to ensure everyone enjoys your delicious creations!
Chill Your Dough
After mixing your dough, chill it for at least 30 minutes. This helps maintain shape while baking and can result in tender, crisp cookies. Plus, it’s the perfect time to prepare your Halloween-themed decorations!
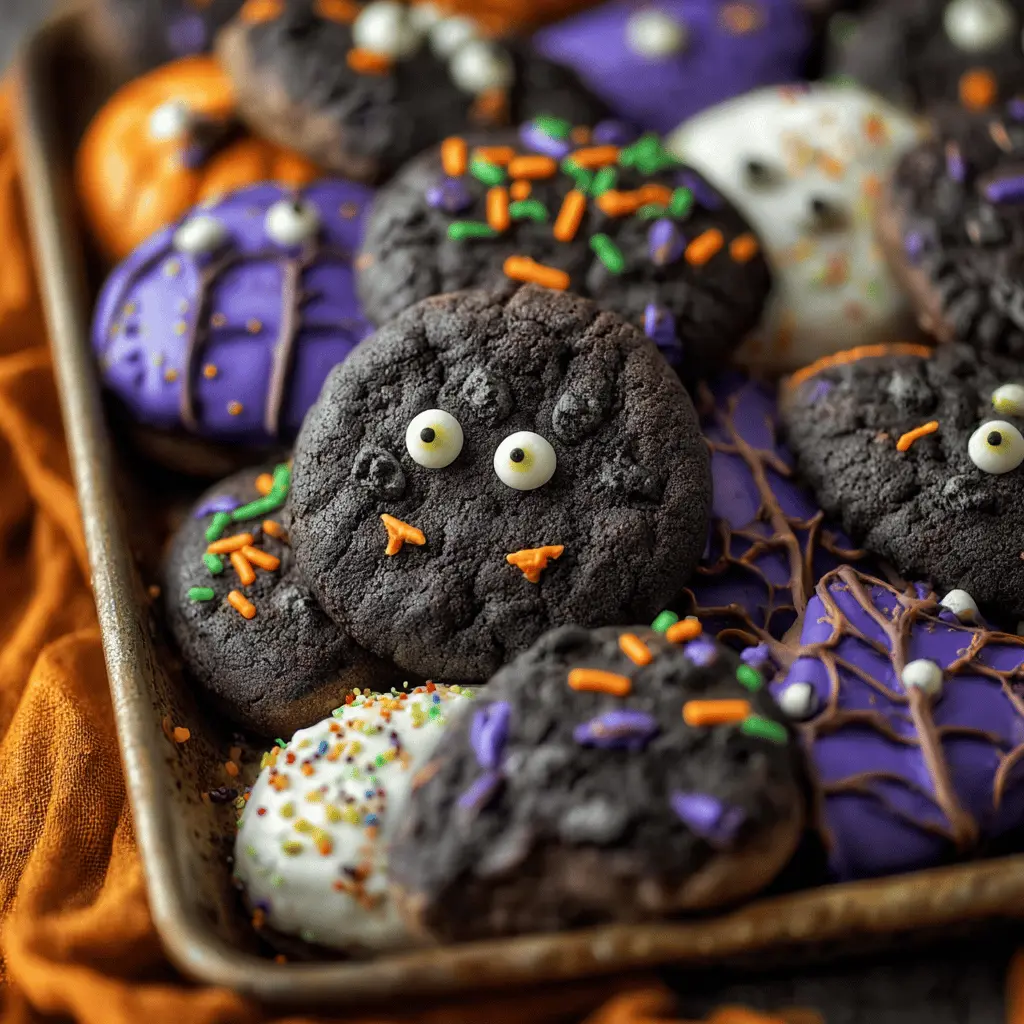
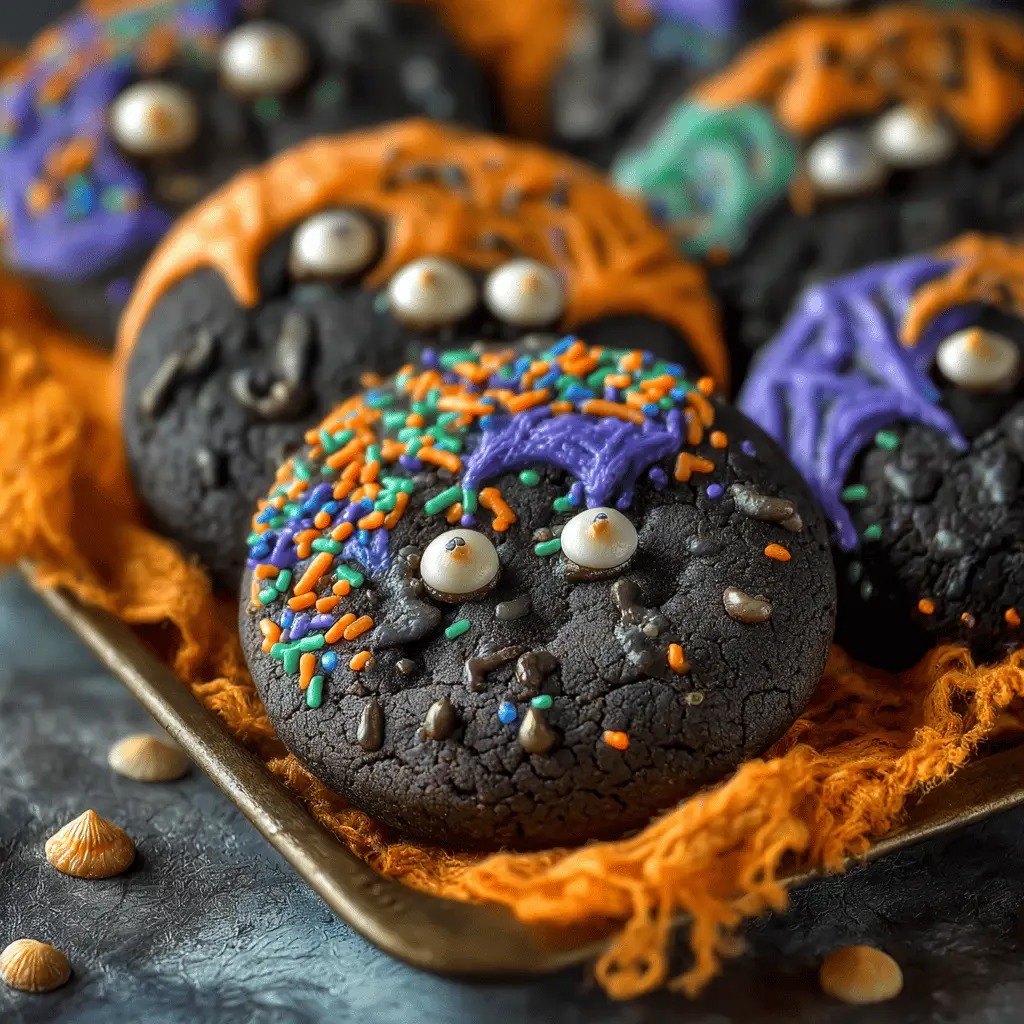
Creative Decorations
Get festive with your designs! Use vibrant icing, edible glitter, or candy eyes to bring your Halloween cookies to life. Don’t shy away from letting your creativity flow—think of spooky ghost shapes or adorable pumpkin faces!
Baking Time Adjustments
Every oven is different, so keep an eye on your cookies during baking. If you prefer chewier cookies, take them out slightly earlier.
With these tips, you’ll create wonderful Halloween cookies that taste just as good as they look. Looking for even more inspiration? Check out this guide on festive baking techniques!
Creative Serving Suggestions for Halloween Cookies
When it comes to presenting your Halloween Cookies at parties, creativity can really elevate the experience. Here are some fun ways to showcase your cookie creations that will have your guests raving!
Fun Ways to Present Your Cookies at Parties
-
Themed Platters: Use a large platter shaped like a pumpkin or a skeleton to arrange your cookies. This not only adds a festive touch but also creates a visually appealing centerpiece.
-
Cookie Stands: Stack your cookies on multi-tiered cake stands for a delightful display. You can even decorate each tier with themed decorations—think cobwebs or mini plastic spiders!
-
Individual Treat Bags: For a personal touch, package each Halloween Cookie in a cellophane bag tied with a ribbon. You can label each bag with cute tags like “Witch’s Delight” or “Ghostly Goodies.” This is not only a fun way to serve but doubles as a party favor!
-
Cookie Decorating Station: Set up a DIY decorating station with your cookies, icing, and toppings. It invites guests to get creative while enjoying their favors.
These simple yet engaging ideas will have everyone excited to indulge in your delightful Halloween Cookies. Check out more tips for festive gatherings on sites like Martha Stewart and Taste of Home for inspiration!
Time Breakdown for Halloween Cookies
When it comes to making delightful Halloween Cookies, effective time management can make all the difference. Here’s a quick breakdown to help you plan your baking adventure:
Preparation Time
Get your kitchen ready, gather your ingredients, and mix your cookie dough. This usually takes about 20 minutes. Pro tip: prepping ahead can save you time!
Baking Time
Once your dough is chilled (about 10-15 minutes), you’re ready to bake. Each batch takes approximately 10-12 minutes in the oven. Keep an eye on them to ensure you achieve that perfect golden edge.
Total Time
From mixing to enjoying, you’re looking at a total of around 50-60 minutes. This gives you plenty of time to clean up and even squeeze in a quick spooky movie before your Halloween Cookies are ready to enjoy!
For more inspiration, check out this helpful guide on cookie decorating.
Remember, the joy of baking isn’t just in the cookies but also in the memories you create along the way!
Nutritional facts for Halloween Cookies
When indulging in delightful Halloween Cookies, it’s good to be aware of what you’re treating yourself to. Let’s break down some key nutritional facts that will help you enjoy these festive treats mindfully.
Calories
On average, a single Halloween Cookie contains about 100-150 calories. This can vary based on the ingredients you choose and the size of your cookies. Choosing whole grains and reducing sugary toppings can help keep those calories in check.
Sugar content
Now, let’s talk sugar! Each cookie typically has around 10-12 grams of sugar. Sugary delights are certainly part of the fun on Halloween, but if you’re concerned about your sugar intake, consider using natural sweeteners or reducing the overall amount of added sugar in your recipe.
For more on sugar and its effects, you might find this article from the American Heart Association quite insightful. Balancing enjoyment with awareness can make your Halloween celebration both delicious and healthy!
FAQs about Halloween Cookies
Can I freeze Halloween cookies?
Absolutely! Freezing Halloween cookies is a fantastic way to preserve their freshness. You might want to freeze them before or after decorating. Just ensure they are completely cool, then wrap them tightly in plastic wrap, followed by aluminum foil, or place them in an airtight container. When you’re ready to indulge, thaw them in the refrigerator or at room temperature. For some helpful freezing tips, check out the Joy of Baking.
How long do Halloween cookies last?
When stored properly in an airtight container at room temperature, your Halloween cookies should stay fresh for about a week. If you’ve decided to add icing, they might last a few days longer, depending on the ingredients used. However, for the ultimate flavor and texture, it’s best to enjoy them within the first 3-5 days. If you notice them starting to harden, that’s a sign they might not be at their peak anymore.
Can I use gluten-free flour for Halloween cookies?
Definitely! Using gluten-free flour in your Halloween cookie recipes is a great alternative if you’re accommodating dietary needs. Many bakers find success with a blend of gluten-free flours like almond flour or a gluten-free all-purpose mix, but you’ll want to keep an eye on your cookie consistency. It’s always a good idea to follow a specific gluten-free recipe to ensure the right texture and flavor shine through. For more guidance, the Gluten Free Society offers extensive resources to get you started.
By addressing these common questions, you can feel more confident and excited about your Halloween cookie-making adventure!
Conclusion on Halloween Cookies
As we embrace the spooky season, this is a fantastic opportunity to whip up Halloween Cookies that not only satisfy your sweet tooth but also ignite your creativity. Don’t be shy—experiment with colors, flavors, and designs to truly make these treats your own! Whether you’re baking with friends, family, or even on your own, the fun lies in the process. Who doesn’t love the smell of cookies baking in the oven? Remember, it’s all about the shared moments and joyful memories. So roll up your sleeves and dive into this delicious adventure; your perfect batch of Halloween cookies awaits! For recipe inspiration and tips, check out sources like The Kitchn and Taste of Home for more creative ideas.
PrintHalloween Cookies: Easy Spooky Treats for a Fun Celebration

Get into the spirit of Halloween with these easy spooky cookies that are perfect for a fun celebration.
- Prep Time: 20 minutes
- Cook Time: 12 minutes
- Total Time: 32 minutes
- Yield: 24 cookies 1x
- Category: Dessert
- Method: Baking
- Cuisine: American
- Diet: Vegetarian
Ingredients
- 2 cups all-purpose flour
- 1 cup granulated sugar
- 1/2 cup unsalted butter, softened
- 1 large egg
- 1 teaspoon vanilla extract
- 1 teaspoon baking powder
- 1/2 teaspoon salt
- 1 cup Halloween-themed sprinkles
Instructions
- Preheat your oven to 350°F (175°C).
- In a bowl, cream together the butter and sugar until light and fluffy.
- Add the egg and vanilla, mixing until well combined.
- In a separate bowl, whisk together the flour, baking powder, and salt.
- Gradually add the dry ingredients to the wet ingredients until just combined.
- Fold in the sprinkles.
- Drop tablespoon-sized amounts of dough onto a baking sheet lined with parchment paper.
- Bake for 10-12 minutes or until edges are lightly golden.
- Allow cookies to cool on the baking sheet for a few minutes before transferring them to a wire rack to cool completely.
Notes
- For extra spooky decorations, use colored icing or additional sprinkles.
- These cookies can be stored in an airtight container for up to one week.
Nutrition
- Serving Size: 1 cookie
- Calories: 150
- Sugar: 12g
- Sodium: 50mg
- Fat: 7g
- Saturated Fat: 4g
- Unsaturated Fat: 2g
- Trans Fat: 0g
- Carbohydrates: 20g
- Fiber: 0g
- Protein: 1g
- Cholesterol: 20mg
Keywords: Halloween Cookies