Introduction to Bomb Pops
The Nostalgia of Summer Treats
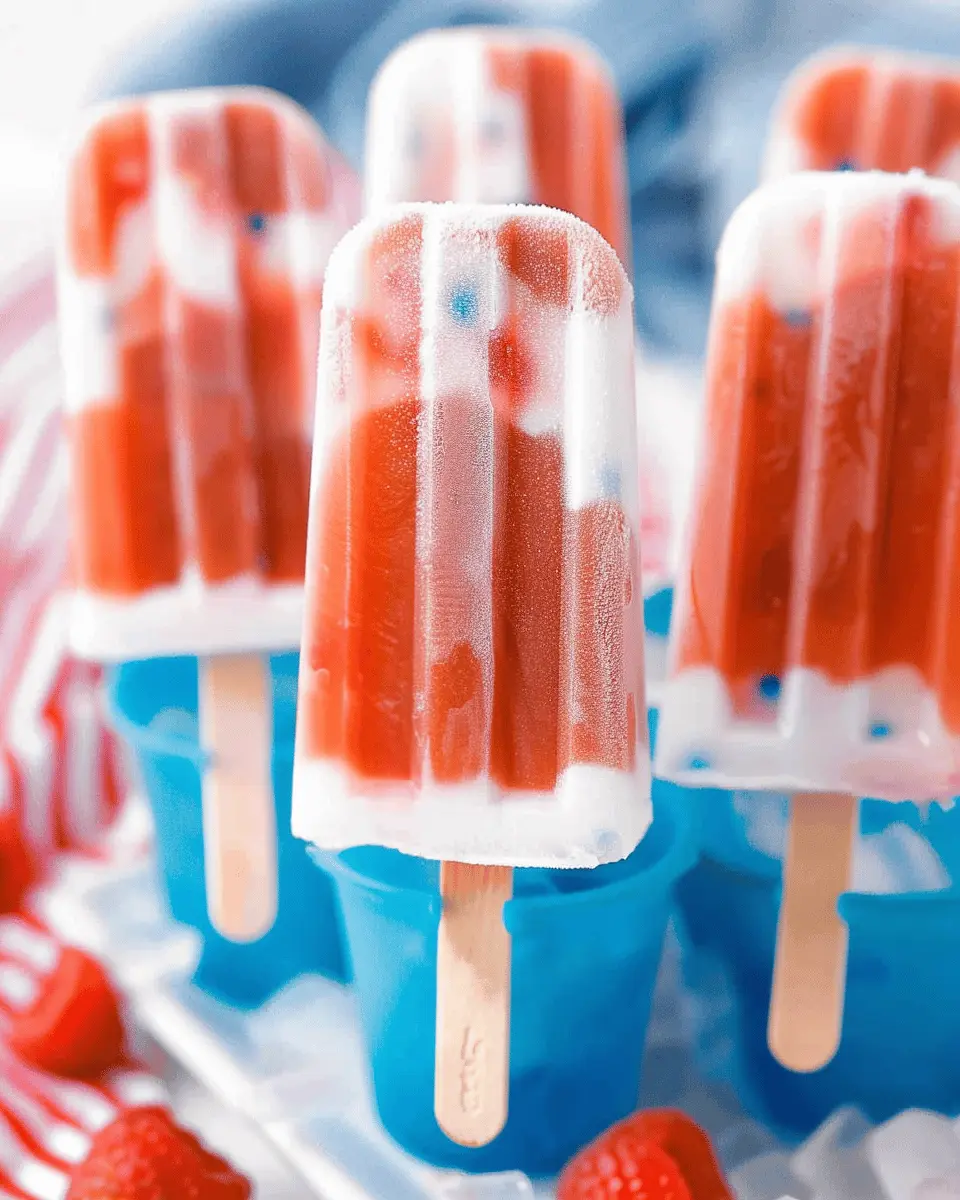
Ah, the bomb pop. Just the mention of this iconic frozen treat can transport us back to sun-drenched summers of our childhood. Remember those hot days when the ice cream truck would roll into the neighborhood, its jingle echoing like a sweet siren call? For many of us, grabbing a bomb pop from that truck was a summer rite of passage—a moment of pure joy tinged with a hint of nostalgia.
Originating in the 1950s, bomb pops have become a staple of American summertime snacks. Their vibrant red, white, and blue layers aren’t just eye-catching; they also pack a punch of flavor that excites the taste buds. If you’re keen to explore a little more about the history of frozen treats, check out History.com for a rich account of how these delights evolved.
As adults, we might not frequent ice cream trucks as often, but that doesn’t mean we can’t indulge in a bomb pop or two. Making your own at home can reignite that childhood joy—plus, you get to control the ingredients! Want a healthier version? Try using fresh fruit juices or yogurt instead of store-bought soda flavors.
Here’s why bomb pops are so special:
- Fun Flavor Layers: The combination of cherry, lemon, and blue raspberry creates a delightful sweet and tart balance.
- Customizable Options: You can easily make them vegan, gluten-free, or even sugar-free if desired, making them inclusive for different dietary preferences.
- Festive Appeal: Their vibrant colors make them perfect for summer gatherings, Memorial Day, or Independence Day celebrations.
The beauty of a bomb pop lies not just in its taste, but also in the memories it evokes. Who doesn’t have a story of a hot day spent with sticky fingers and laughter? So whether you’re recreating those childhood moments or introducing this classic to a new generation, the joy of a bomb pop is timeless. Ready to dive into your own DIY version? Let’s get popping!
Essential Ingredients for the Classic Bomb Pop
Creating your own homemade bomb pops is a fantastic way to indulge in nostalgia while enjoying a refreshing treat. The beauty of these iconic pops lies in their simplicity. Here’s what you need to whip up some classic bomb pops:
- Water: The base of your pops, providing that signature icy texture.
- Fruit Juices: Use vibrant flavors like cherry, blue raspberry, and lime. Freshly squeezed juice will enhance the flavor immensely!
- Sugar: A dash of granulated sugar helps to balance the tartness of the juices. For a healthier alternative, consider using agave or honey.
- Food Coloring: While optional, a few drops can boost the visual appeal of your bomb pop. Just remember to opt for natural dyes when you can.
- Molds: You can use traditional popsicle molds or even make mini bomb pops using ice cube trays.
Ready to transform your summer afternoons? By using these simple ingredients, you can create a nostalgic treat that’s both fun and delicious. For more tips on ingredient selection, check out this guide on choosing the best fruits for homemade popsicles.
Preparing Bomb Pops
Making bomb pops is a delightful way to embrace those hot summer days. They’re not just refreshing; the colorful layers of flavor can evoke a sense of nostalgia, reminding you of childhood treats at the local pool or beach. If you’re ready to dive into this fun and vibrant DIY project, let’s break it down into easy-to-follow steps!
Gather Your Ingredients
Before getting your hands sticky, gather everything you need to make your bomb pops a reality. Here’s what you’ll need:
-
Red Layer:
-
1 cup cherry or strawberry juice (freshly squeezed or store-bought)
-
2 tablespoons sugar (adjust based on your taste)
-
Optional: 1 tablespoon of lemon juice (for a zesty kick)
-
White Layer:
-
1 cup coconut milk (canned for creaminess)
-
2 tablespoons sugar (or to taste)
-
Blue Layer:
-
1 cup blue raspberry lemonade (found in stores or homemade)
-
2 tablespoons sugar (again, adjust according to your preference)
You’ll also need some popsicle molds and sticks. If you’re curious about different types of molds, this Martha Stewart article explores various options.
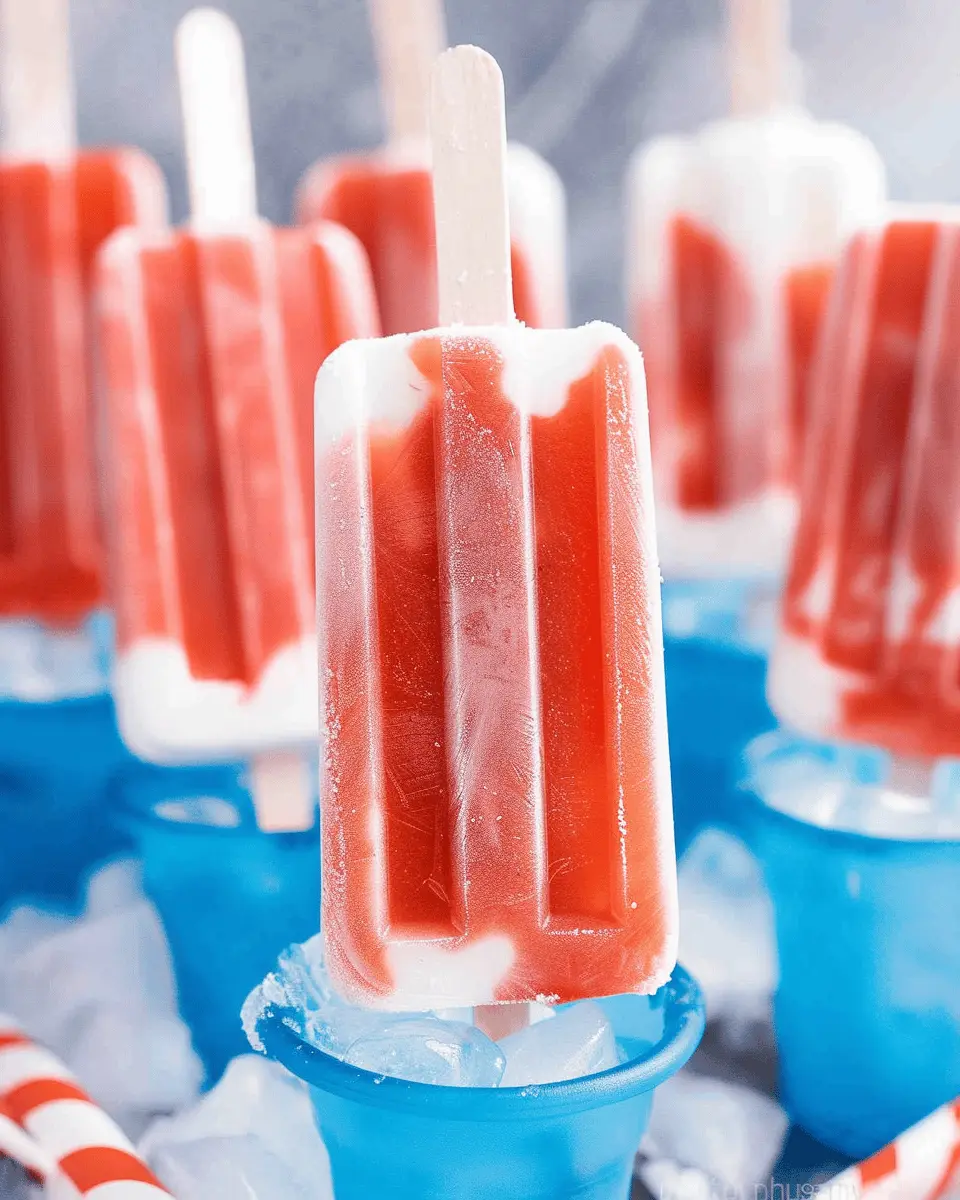
Create the Red Layer
Start with the vibrant red layer. In a saucepan, combine your cherry or strawberry juice with the sugar. Heat it over medium-low until the sugar dissolves completely. Let this mixture cool for about 10 minutes. Once cooled, pour the juice into your popsicle molds, filling them about one-third full.
Crafting the White Layer
Now it’s time to add the creamy white layer! In a separate bowl, mix the coconut milk and sugar until well combined. This coconut layer provides a nice flavor contrast to the fruity layers. Once mixed, carefully pour it over the red layer in your molds, again filling them about one-third of the way. You can use a spoon to gently guide the mixture and avoid mixing the colors together.
Whip Up the Blue Layer
For the final touch, let’s whip up that beautiful blue layer. Just like before, combine your blue raspberry lemonade and sugar in a bowl, stirring until everything’s mixed. Carefully pour this bright blue mixture into each mold on top of the white layer. Fill the molds all the way to the top this time, making sure to leave a little space for expansion as it freezes.
Freeze the Layers Properly
Freezing is where the magic happens! Place your filled molds in the freezer. It’s best to let them freeze for at least 4 hours or overnight if you want to be sure they are completely solid. You can help them set evenly by inserting the popsicle sticks into the molds after about 1.5 to 2 hours. This allows the layers to freeze partially and makes it easier to insert the sticks without them floating.
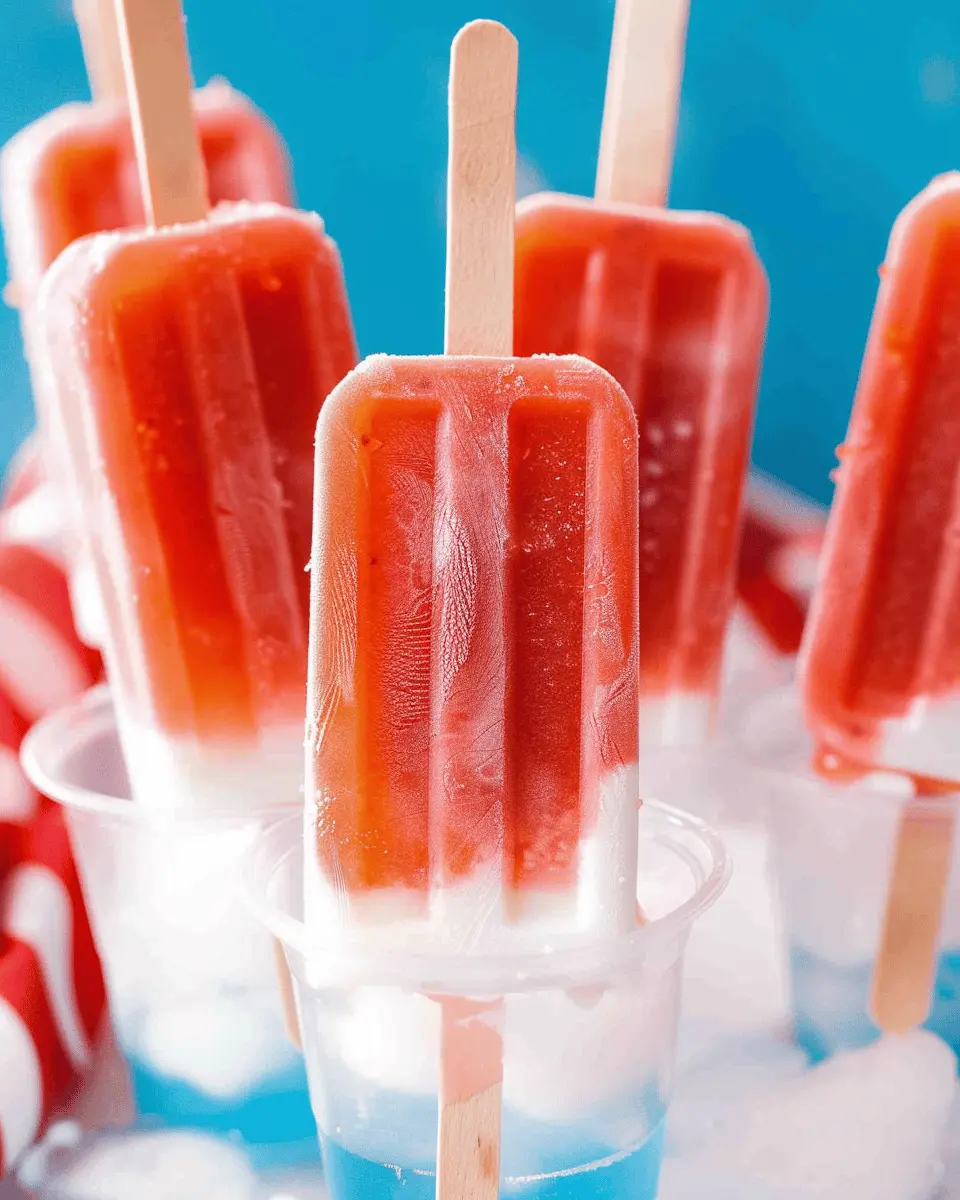
Assembling Your Bomb Pops
Once everything is frozen solid, it’s time to release those bomb pops from their molds. To do this, run the molds under warm water for just a few seconds. This will help loosen the pops without melting them too much. With a gentle pull, you should be able to slide them out easily.
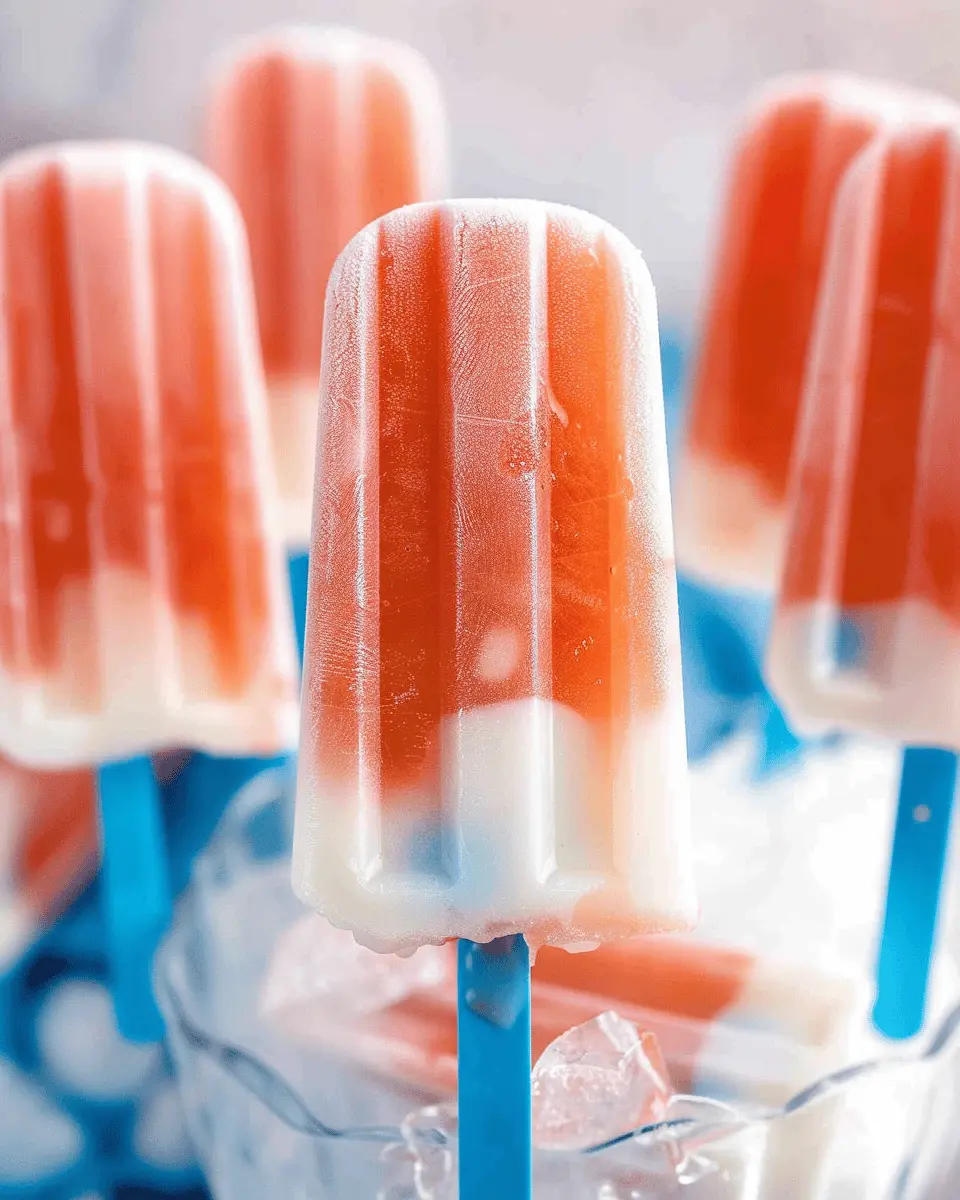
Admire your colorful bomb pops, and enjoy a taste of summer nostalgia with every bite! They are perfect for backyard barbecues, pool parties, or just a cozy evening on your porch. If you’re looking for more fun summer recipes, check out this Delish guide!
And there you have it! Making your own bomb pops not only guarantees deliciousness but also gives you a fun little adventure in your kitchen. Enjoy!
Variations on Bomb Pops
When it comes to bomb pops, the possibilities are endless. Let’s dive into some flavorful twists that can suit any palate.
Tropical Bomb Pop with Fruity Flavors
If you’re ready to transform the classic into something fresh and exciting, consider a tropical bomb pop. Start by blending vibrant fruits like mango, pineapple, and coconut milk. The combination will give you a creamy, refreshing result that’s perfect for hot summer days. You can layer the flavors into your molds for a sun-kissed treat. For an added zing, toss in some lime juice or a splash of passion fruit puree. Interested in recipes using tropical fruits? Check out Healthline for some tips!
Healthier Bomb Pop Options
Keeping it healthy doesn’t mean skimping on flavor. Try using pureed fruit as a base, or opt for Greek yogurt to create a creamy yet low-calorie treat. You can sweeten your bomb pops naturally with honey or agave syrup instead of refined sugars. Not only are these options guilt-free, but they also pack a nutritional punch. For added enjoyment, think about using fresh herbs like mint or basil to elevate the flavors!
Adult-Themed Bomb Pop Recipes
Let’s be honest: sometimes, you just want a grown-up treat. Adult-themed bomb pops can be crafted by incorporating ingredients like boozy blends. Mix up cocktails like piña colada or mojito using your favorite alcohol. The key? Blend the spirits in with fresh juices for a refined treat that’s perfect for cocktail hours. Before freezing, you might want to add some chopped fruit or herbs as a fun surprise.
Whether you lean towards fruity, healthy, or adult-themed, everyone can enjoy a unique spin on the classic bomb pop!
Cooking Tips and Notes for Bomb Pops
Choosing the Right Molds
When it comes to making the perfect bomb pop, selecting the right molds is crucial for a successful outcome. Look for silicone molds, as they make it easier to release your frozen treats without any hassle. Plus, they are often available in fun designs! Check out Amazon or local kitchen supply stores for various options.
Tips for Layering Colors
Layering colors is not only fun but also a chance to get creative with your bomb pop flavors. Here are some tips to help you master the art of layering:
- Wait for Each Layer to Freeze: Allow each layer to set for about 30 minutes before adding the next. This creates a clean separation between colors.
- Pour Slowly: Pour the mixture gently to avoid disturbing the previous layer.
- Experiment with Flavors: Combine complementary flavors like cherry, lime, and blue raspberry for a vibrant and tasty experience. You can find flavoring ideas on Food Network.
Getting the layers right might take practice, but the payoff is delicious popsicles that not only look good but taste amazing too. Enjoy your making adventure!
Serving Suggestions for Bomb Pops
Perfect occasions for enjoying bomb pops
Bomb pops are the quintessential summertime treat, perfect for a variety of occasions! Imagine hosting a backyard barbecue or celebrating a birthday party; these colorful pops will surely be a hit with both kids and adults. They’re ideal for cooling down on a hot day, enjoying a picnic in the park, or even winding down after a long work week. The vibrant colors also make them fantastic for festive gatherings, like Fourth of July celebrations or summer pool parties. So whether it’s a casual get-together or a special event, bomb pops offer a nostalgic twist that everyone can appreciate.
Pairing bomb pops with other snacks
To elevate your bomb pop experience, think about pairing them with other delightful snacks. For a balanced treat, consider serving salty snacks like popcorn or tortilla chips. You can also complement the sweetness with fresh fruit, such as strawberries or watermelon, for a refreshing contrast. If you’re feeling adventurous, whip up some homemade whipped cream or yogurt for dipping—it adds an extra layer of fun! To dive deeper into snack ideas, check out resources like Food Network for inspiration.
Time breakdown for Bomb Pops
When dreaming of a cool treat on a warm day, you might wonder how much time it takes to whip up some homemade Bomb Pops. Let’s break it down!
Preparation time
You’ll need about 15 minutes to gather your ingredients and mix your colorful layers. This is the fun part, as you get to channel your inner artist while crafting those beautiful red, white, and blue layers.
Freezing time
Once everything is prepped, the real patience-testing fun begins. Pop your mixtures in the freezer for at least 4-6 hours. This ensures that each layer sets perfectly and gives you that satisfying, icy crunch.
Total time
Altogether, you’re looking at roughly 4 to 6 hours and 15 minutes to create these delightful Bomb Pops. So, when you have a gathering or just a sunny day in mind, prepare in advance! For tips on how freezing affects texture, check out this article on frozen treats.
Before you know it, you’ll have the perfect homemade pops waiting to brighten your day!
Nutritional facts for Bomb Pops
Understanding the nutritional facts of Bomb Pops can help you enjoy this classic frozen treat while keeping your health in check. Let’s break it down.
Calories per serving
A typical Bomb Pop contains about 70 calories per serving. This makes it a relatively light dessert option, perfect for cooling off on a hot day without the guilt.
Sugar content
When it comes to sugar, these nostalgic pops hold around 12 grams per serving. While it’s best to enjoy treats like this in moderation, being aware of sugar content can help you maintain a balanced diet, especially if you’re following guidelines from health resources like the American Heart Association.
Ingredients breakdown
The ingredients typically include:
- Water: The main base, keeping it refreshing.
- High fructose corn syrup: Adds sweetness and enhances flavor.
- Natural and artificial flavors: Deliver that iconic taste.
- Citric acid: Provides a tangy kick.
- Coloring agents: Give it that vibrant look.
If you’re looking to make healthier choices or are curious about specific ingredients, consider making your own Bomb Pops at home for full control over what goes in. This recipe is not just fun but can also promote your creative culinary side!
Incorporating homemade versions allows you to experiment with natural sweeteners like honey or agave syrup while reducing overall sugar intake. Plus, isn’t it satisfying to customize your flavors? With this guide, you can savor every nostalgic bite while being mindful of your nutrition!
FAQs about Bomb Pops
Can I make bomb pops without molds?
Absolutely! If you don’t have ice pop molds, you can still create delightful bomb pops using simple materials. Here are a couple of alternatives:
- Paper cups: Fill small paper cups with your bomb pop mixture. Once frozen, you can peel away the cup for easy enjoyment.
- Ice cube trays: These work just as well for smaller, bite-sized treats. Just insert toothpicks for easy handling.
Feel free to get creative! A quick search can lead you to various DIY mold options if you want to elevate your bomb pop game.
What is the best way to store bomb pops?
Store your homemade bomb pops in a freezer-safe container to maintain their flavor and texture. Here are some storage tips:
- Wrap them individually with plastic wrap to prevent freezer burn.
- For longer storage, use an airtight container to help them last up to 3 months. Just make sure to label the container for easy access later.
For more tips on storing homemade treats, you can explore resources like the USDA’s Food Safety site.
How can I adjust sugar levels in bomb pops?
Managing sugar levels in your bomb pops can be easily achieved. If you want to make them healthier:
- Sweeteners: Consider alternatives like honey, agave, or stevia. Just remember that these may alter the texture and freezing properties.
- Fruit Purees: Using fruit purees not only lowers sugar but also adds natural flavor. Think mashed bananas or blended berries!
Always taste your mixture before pouring it into molds. This way, you can find the perfect balance that suits your palate!
For more useful information about nutrition and healthy eating, the CDC’s nutrition resources are a great place to start.
Conclusion on Bomb Pops
Recap of Benefits and Enjoyment
In wrapping up our exploration of the bomb pop, it’s clear these frozen treats are not just delightful but offer a host of benefits too. They are a nostalgic nod to childhood, perfect for hot summer days. By making these at home, you can customize the ingredients, ensuring healthier options without sacrificing flavor.
- Customizable flavors: Mix and match your favorite fruit juices or yogurt.
- Fun for all occasions: Great for parties, barbecues, or simply as an afternoon refreshment.
- Nostalgic treat: Reminds us of carefree summers spent outdoors.
So, why not whip up these colorful pops and share the experience with friends? You’ll be surprised how much joy a bomb pop can bring. For more creative ideas, check out sources like Serious Eats or The Kitchn.
PrintBomb Pop Bliss: Easy Homemade Treats for Summer Joy
Enjoy the vibrant flavors of summer with these easy homemade Bomb Pops.
- Prep Time: 15 minutes
- Cook Time: 0 minutes
- Total Time: 4 hours
- Yield: 6 pops 1x
- Category: Dessert
- Method: Freezing
- Cuisine: American
- Diet: Vegan
Ingredients
- 2 cups fruit juice (red, white, and blue flavors)
- 1 cup water
- 1/2 cup sugar
- 1 teaspoon lemon juice
Instructions
- In a saucepan, combine sugar and water, bringing it to a boil until sugar dissolves.
- Divide mixture into three bowls, add fruit juice and lemon juice to each, coloring them red, white, and blue.
- Pour the red mixture into molds and freeze until solid.
- Pour the white mixture over the red layer and freeze again until solid.
- Repeat with blue mixture, freeze until the entire pop is solid.
Notes
- For a fun twist, add chopped fruits in the layers.
- Experiment with different fruit juice combinations.
Nutrition
- Serving Size: 1 pop
- Calories: 80
- Sugar: 15g
- Sodium: 5mg
- Fat: 0g
- Saturated Fat: 0g
- Unsaturated Fat: 0g
- Trans Fat: 0g
- Carbohydrates: 21g
- Fiber: 0g
- Protein: 0g
- Cholesterol: 0mg
Keywords: Bomb Pop, summer treats, homemade, frozen desserts