Introduction to Baked Pears
Baked pears are an easy yet impressive dessert that brings together the warmth of a home-cooked treat and the sophistication of fine dining. Whether you’re hosting friends or looking to indulge yourself after a long day, these juicy gems can make anyone feel special. Not to mention, baked pears are not just delicious; they offer a variety of health benefits too. Did you know that pears are high in fiber and essential vitamins? An impressive treat and a boost to your wellness—what’s not to love?
But what truly makes baked pears special is their versatility. You can customize them to suit your taste. Want something festive? Add cinnamon or nutmeg for warmth. Prefer something zesty? A dash of lemon juice can elevate the flavor. The possibilities are endless! If you’re in search of ideas, check out this link for some inspiration on perfect spice pairings.
Why Baked Pears Are the Perfect Homemade Treat
When it comes to dessert, homemade options often feel more rewarding—especially when they come together with minimal fuss. Baked pears exemplify this idea perfectly. With just a handful of ingredients, you can create a dish that’s both visually stunning and packed with flavor. Not only do they look elegant on a plate, but they also evoke that cozy, warm feeling that’s ideal for gatherings or a quiet evening at home.
Here’s why baked pears are a bite-sized dream:
- Simple Preparation: The most challenging part is slicing the pears, which takes just minutes. You won’t need to spend hours in the kitchen!
- Health Consciousness: Unlike many heavy desserts, baked pears can be enjoyed guilt-free. They’re naturally sweet and offer nutrients without the unnecessary calories.
- Make-Ahead Friendly: You can prepare them ahead of time and pop them in the oven when guests arrive, making entertaining stress-free.
The beauty of baked pears is that they can also pair wonderfully with various accompaniments, such as Greek yogurt for creaminess or a sprinkle of nuts for crunch. So whether you’re preparing for a dinner party or just craving something sweet, get ready to impress your taste buds! Check out our full baked pears recipe below to get started on this delightful journey.
Ingredients for Baked Pears
When you’re craving a sweet yet healthy dessert, baked pears are a fantastic choice! They’re simple to prepare and can be customized to suit your taste. Let’s dive into the essential ingredients you’ll need to whip up these delightful treats.
Fresh Pears
- Quantity: 4 medium-sized pears
- Tip: Choose ripe pears that are firm to the touch, like Bosc or Anjou, for the best results.
Sweetener
- Options: Honey or maple syrup
- Adding a drizzle of honey or a splash of maple syrup can enhance the natural sweetness of the fruit without overpowering it.
Spices
- Essentials: Ground cinnamon and nutmeg
- Why: These spices will elevate your baked pears, giving them warmth and depth. A dash of cinnamon is particularly popular, offering that cozy vibe.
Nuts
- Preferred types: Pecans or walnuts
- Chopped nuts add a delightful crunch! They provide texture and a nutty flavor that beautifully complements the soft pears.
Optional Add-ons
- Toppings: Greek yogurt or a dollop of whipped cream
- To really elevate your dessert experience, consider serving your baked pears with a scoop of Greek yogurt, which adds creaminess and a bit of tang.
With these ingredients in hand, you’re well on your way to making a delicious and healthy dessert! For additional tips on selecting the best produce, check out resources from USDA Produce Guidelines for more insights.
Step-by-Step Preparation for Baked Pears
Creating baked pears is one of the most delightful experiences in the kitchen, blending simplicity with a touch of elegance. Let’s walk through the preparation step by step so that you can impress friends, family, or simply enjoy a tasty treat for yourself.
Gather and prepare your ingredients
Before diving in, it’s best to gather everything you’ll need. Here’s what you should have on hand:
- 4 ripe, firm pears (Bartlett or Anjou work wonderfully)
- 1 cup of fresh cranberries (you can also use dried cranberries if you prefer)
- 1 cup of apple juice (for sweetness and moisture)
- 1 teaspoon of ground cinnamon
- ¼ cup of chopped walnuts or pecans
- 2 tablespoons of honey or maple syrup
- A dash of salt
Once you have all your ingredients ready, give your work area a quick clean. This is not only nice to look at but makes the cooking process smoother. Make sure to wash the pears thoroughly as you’ll be keeping the skin on for added texture and flavor.
Preheat the oven for optimal baking
An often overlooked step in baking is preheating the oven. Turn your oven to 375°F (190°C) to create the perfect environment for your baked pears. This process usually takes about 10-15 minutes, so while it’s warming up, you can focus on prepping your pears. Pro tip: using a kitchen thermometer can help ensure your oven is at the exact temperature you desire.
Prepare the pears for baking
Now that your oven is heating, it’s time to prepare the star of our dish—the pears! Begin by slicing them in half lengthwise. This not only makes them look beautiful while baking but also allows the flavors of the filling to seep in. Use a melon baller or spoon to remove the core carefully. Don’t worry about making it look immaculate; rustic is the new chic!
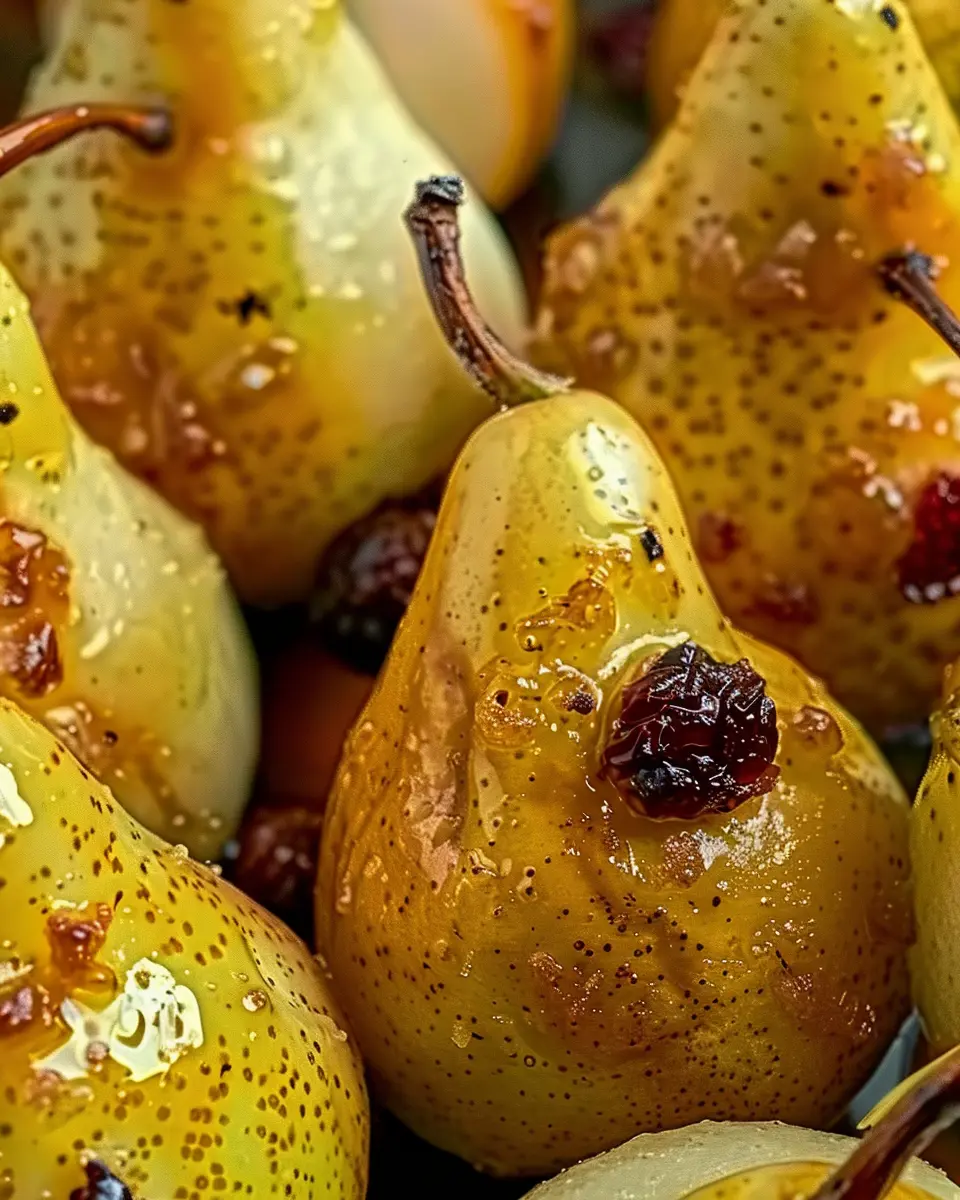
Roast the pears to perfection
Once your pears are halved and cored, arrange them cut-side-up in a baking dish. This positional choice will ensure they soak up the delicious flavors as they cook. If you want to be extra creative, you can drizzle a bit of apple juice over them before placing them in the oven. Bake your pears for about 20-25 minutes, or until they are tender and slightly caramelized. You can flip them halfway through if you want an even cook.
Create the flavorful cranberry mixture
While the pears are baking, it’s time to whip up a zesty cranberry mixture. In a medium saucepan over medium heat, combine the fresh cranberries, apple juice, ground cinnamon, and a pinch of salt. Stir until the cranberries start to burst and the mixture thickens, about 5-10 minutes. Feel free to adjust sweetness by adding honey or maple syrup—this mixture is all about your taste!
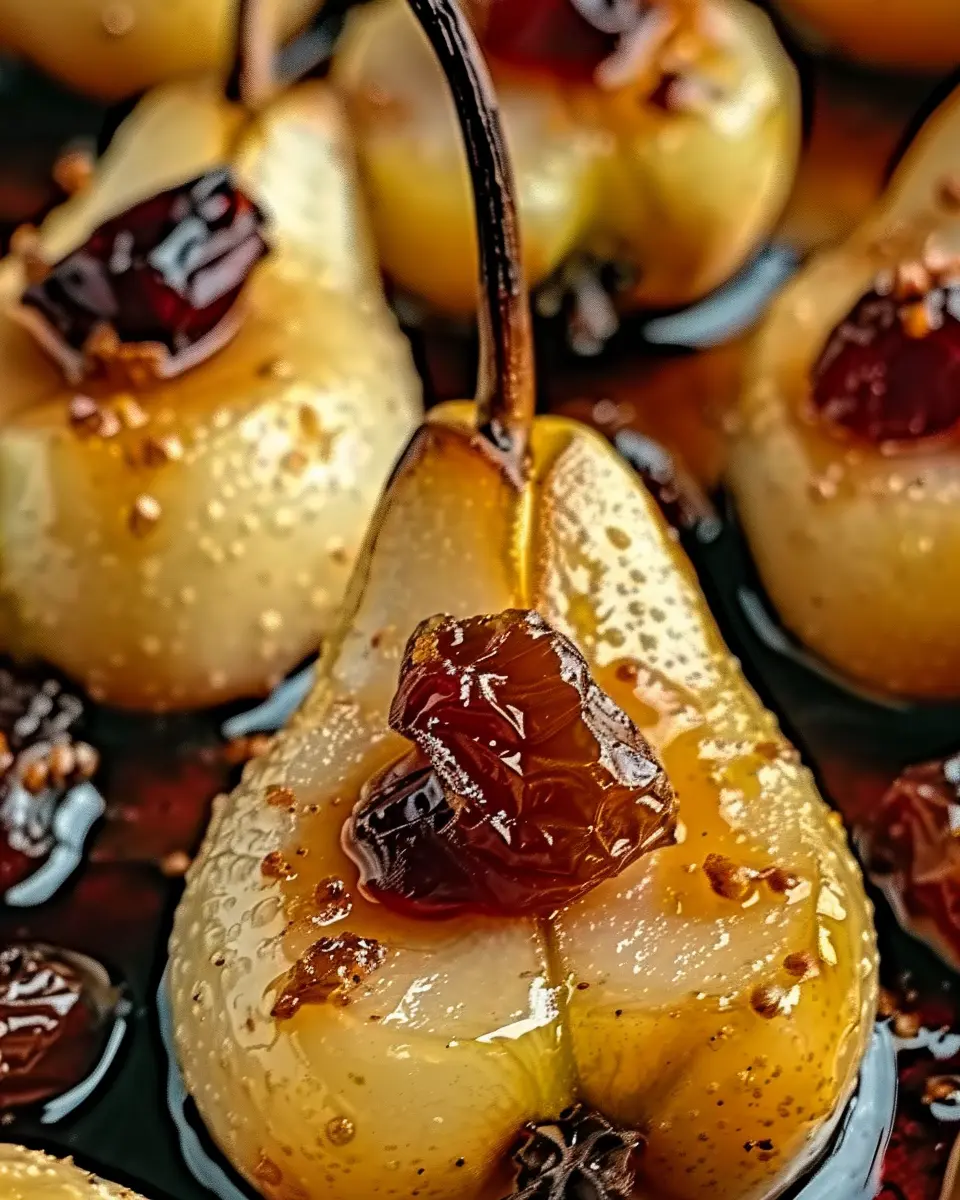
Assemble the baked pears
Once the pears are perfectly roasted and your cranberry mixture is bubbling away, it’s time to assemble! Take the pears out of the oven and carefully spoon the cranberry mixture into the hollowed-out centers. Be generous; you want every bite packed with flavor!
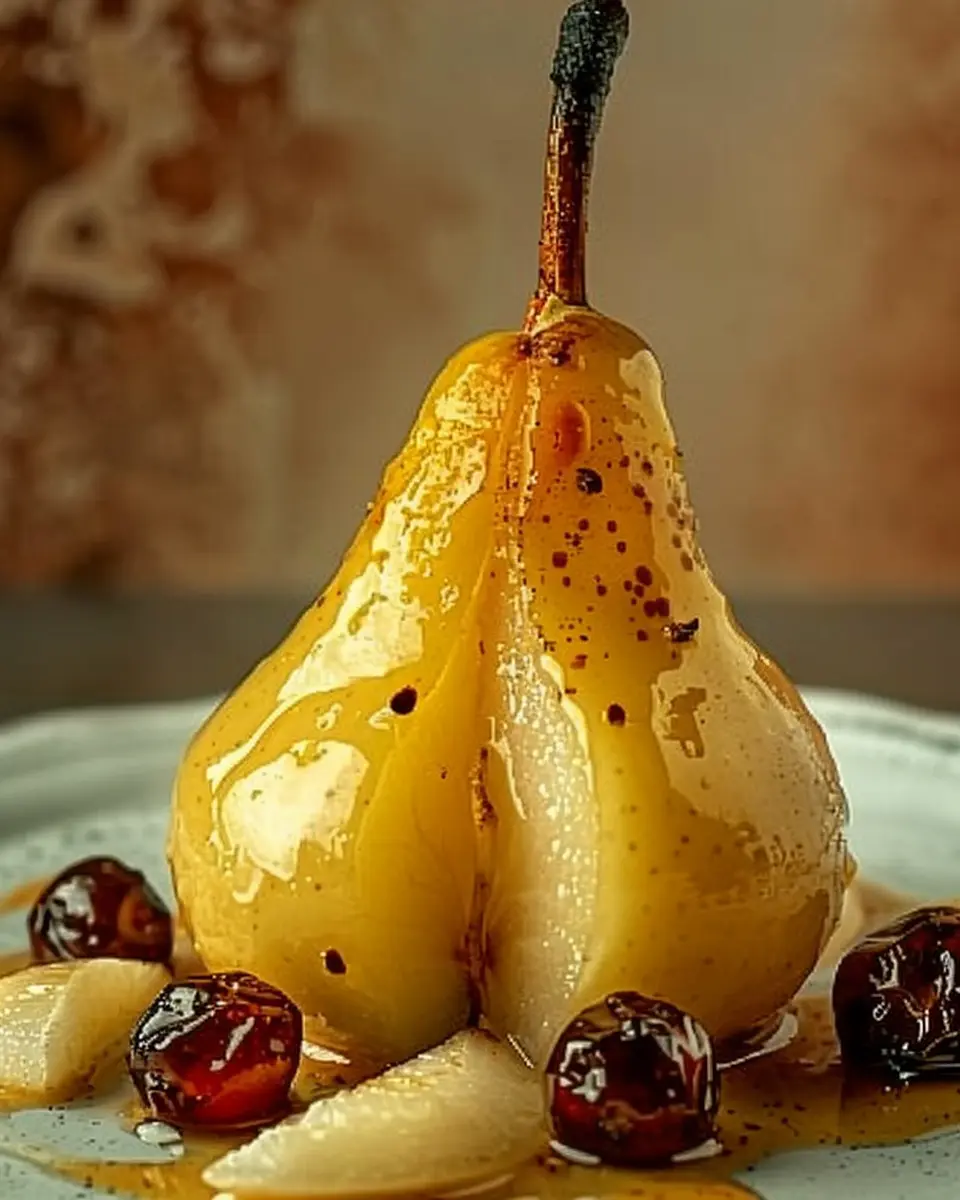
Add the finishing touches
For that gourmet finishing touch, sprinkle the chopped walnuts or pecans on top of your assembled baked pears. If you want to elevate them even further, a dollop of Greek yogurt or a drizzle of honey makes an excellent accompaniment. The contrast between the warm pears and the cool yogurt will have your guests enchanted.
And there you have it—a step-by-step foundation for making stunning baked pears that are as enjoyable to eat as they are to create. Whether it’s for a cozy night in or a gathering with friends, this recipe is bound to brighten your culinary repertoire. Happy baking!
For additional recipe inspiration or cooking tips, consider checking out resources like Food Network or Epicurious for expert advice.
Variations on Baked Pears
Baked pears are a fantastic base for a variety of creative flavor combinations, letting you explore a range of tastes and textures. Here are a couple of delicious variations to help you elevate your dessert game.
Baked Pears with Blue Cheese and Walnuts
For a savory twist, consider pairing your baked pears with blue cheese and walnuts. This combination works beautifully, as the creamy tang of the blue cheese contrasts with the sweet softness of the pears. Here’s how to make it:
- Ingredients: Ripe pears, blue cheese, walnuts, balsamic glaze.
- Instructions:
- Halve the pears and scoop out the seeds.
- Fill the centers with crumbled blue cheese and top with chopped walnuts.
- Drizzle with balsamic glaze before baking for 25 minutes at 350°F.
The(balsamic glaze) adds an extra layer of richness, making it a gourmet dish even your dinner guests will rave about. For more on pairing flavors, check out Serious Eats.
Baked Pears with Chocolate and Nuts
Craving something sweet? Try baked pears topped with chocolate and your favorite nuts. This indulgent treat is not only easy to prepare but also a hit at gatherings.
- Ingredients: Pears, dark chocolate chips, mixed nuts, honey.
- Instructions:
- Cut pears in half, removing the core.
- Sprinkle dark chocolate chips and chopped mixed nuts over the pears.
- Drizzle with honey before baking for 20–25 minutes at 375°F.
The melted chocolate melds beautifully with the pears, offering a rich, comforting dessert. This is the perfect way to satisfy a sweet tooth while enjoying the benefits of fruit! Looking for chocolate options? Visit Chocopedia for some delightful varieties.
With these variations, you can easily customize your baked pears to suit any palate, whether you’re in the mood for something savory or sweet. Enjoy experimenting!
Cooking Tips and Notes for Baked Pears
When it comes to crafting delightful baked pears, there are a few tricks to elevate your dish from good to outstanding. First, always choose ripe but firm pears, like Bartlett or Bosc, for the best texture after baking. If they’re too soft, they may turn mushy.
Flavor Pairing Secrets
For that extra zing, consider adding warm spices like cinnamon or nutmeg. A drizzle of maple syrup or honey can complement the natural sweetness of the pears beautifully. For an added crunch, you might sprinkle some chopped walnuts or pecans on top.
Baking Tips
Ensure your baking dish is lined with parchment paper to make cleanup a breeze. For those looking to infuse more flavor, try using apple cider or fruit juice instead of water—this will create a lovely syrup as they bake.
Serve and Enjoy
Don’t forget to serve your baked pears warm with a scoop of vanilla ice cream or a dollop of yogurt for a creamy contrast. These tips will surely impress your friends and family during your next gathering!
For more in-depth information on the health benefits of pears, check out reputable sources like Healthline and WebMD.

Serving Suggestions for Baked Pears
When it comes to serving baked pears, the options are as delightful as the dish itself. Here are some creative ideas to elevate your dessert and impress your friends at your next gathering.
Pairing with Cheeses
Baked pears complement a variety of cheeses beautifully. Consider serving them alongside:
- Brie: The creaminess of brie pairs wonderfully with the sweet, caramelized notes of the baked pears.
- Gorgonzola: The tanginess of blue cheese offers a perfect contrast, enhancing the sweetness of the fruit.
Adding Crunch
For an appealing texture, top your baked pears with a sprinkle of chopped nuts such as walnuts or pecans. This not only adds crunch but also introduces healthy fats!
Drizzle with Deliciousness
A quick drizzle of maple syrup or honey elevates the sweetness. You could even enhance the experience with a splash of Greek yogurt or a dollop of vanilla ice cream, offering a creamy contrast to the warm fruit.
Creative Hosting Ideas
Treat your guests to a baked pears dessert bar! Set out different toppings like granola, spices, and fresh herbs. It’s a fun, interactive way to conclude a meal, letting everyone customize their dessert to their liking.
Looking for something extra? Check out Food Network’s guide on cheese pairings for more insights! Your baked pears are sure to shine with these suggestions, making them a standout dish.
Time Breakdown for Baked Pears
When you’re ready to impress your friends with baked pears, understanding the time commitment can make your cooking experience smooth and enjoyable.
Preparation Time
It only takes about 15 minutes to prep your ingredients. This includes slicing the pears, mixing the filling, and getting everything ready for the oven. It’s a great time to put on your favorite playlist and get in the zone!
Baking Time
Once the pears are in the oven, you’ll need to wait around 25 to 30 minutes for them to reach that perfect caramelized melt-in-your-mouth texture. While they’re baking, you can whip up a simple side salad or relax and sip on your favorite beverage.
Total Time
In total, expect about 40 to 45 minutes from start to finish. This makes baked pears a fantastic option for a quick yet impressive dessert. So grab your pears, and let the baking begin!
For more tips and variations on baked desserts, check out Epicurious for inspiration!
Nutritional Facts for Baked Pears
Understanding the nutritional profile of baked pears can help you appreciate this delightful dessert even more. Here’s a quick breakdown:
Calories
A medium baked pear typically contains around 100 calories, making it a guilt-free indulgence. When you pair it with healthy toppings like nuts or yogurt, the calorie count remains reasonable while enhancing flavor.
Protein
In terms of protein, baked pears are relatively low, providing roughly 1 gram per serving. However, if you top them with Greek yogurt or turkey bacon, you can significantly boost the protein content for added satisfaction.
Fiber
One of the standout features of baked pears is their fiber content, offering about 5 grams per medium pear. This not only aids digestion but also helps keep you feeling full longer.
For more on the health benefits of pears, you can check resources from the USDA or the American Heart Association.
FAQs about Baked Pears
Can I use other types of cheese in this recipe?
Absolutely! While the recipe may call for a specific cheese, baked pears can be beautifully complemented by a variety of cheeses. Consider goat cheese for its tangy flavor, or brie for its creamy texture that pairs well with the sweetness of the pears. If you’re looking for something stronger, a sharp cheddar can offer an intriguing contrast. Don’t hesitate to experiment based on your taste preferences or whatever you have on hand — it can lead to delightful surprises!
How do I store leftover baked pears?
Storing leftover baked pears is quite simple. Allow them to cool completely, then place them in an airtight container. They can be kept in the fridge for up to three days. For best results, consume them within this time frame to enjoy their optimum flavor and texture. If you’re looking to use them later, consider freezing them. Just make sure to wrap them well and enjoy them within a couple of months.
Can I prepare baked pears in advance?
Definitely! Preparing baked pears in advance can save you time during busy weekdays. You can assemble them up to a day ahead, cover them tightly, and store them in the refrigerator. When you’re ready to enjoy, just pop them in the oven for a quick reheat. This makes for an excellent dessert or even a chic snack for unexpected guests!
If you’re looking for more hosting tips, check out this guide on easy make-ahead desserts. Baked pears are sure to impress!
Conclusion on Baked Pears
Baked pears are a delightful dessert that’s both simple and elegant. With just a handful of ingredients, you can transform ordinary pears into a warm, comforting treat. This dish not only satisfies your sweet tooth but also offers a nutritious option that can be enjoyed year-round.
By adding ingredients like nuts, cinnamon, or a drizzle of honey, you elevate the flavors and make each bite a gourmet experience. Whether served alone or paired with Greek yogurt, these baked pears are bound to impress your guests at any gathering. Try baking pears for your next dinner party and enjoy the delightful compliments that follow! For inspiration, don’t forget to check out more fruity dessert ideas at Food Network.
PrintBaked Pears with Turkey Bacon: A Sweet and Savory Delight

Baked Pears with Turkey Bacon is a delightful combination of sweet and savory flavors, perfect for any meal.
- Prep Time: 10 minutes
- Cook Time: 30 minutes
- Total Time: 40 minutes
- Yield: 4 servings 1x
- Category: Dessert
- Method: Baking
- Cuisine: American
- Diet: Gluten-Free
Ingredients
- 4 ripe pears
- 8 slices turkey bacon
- 2 tablespoons brown sugar
- 1 teaspoon cinnamon
- 1/4 cup chopped walnuts
- Honey for drizzling
Instructions
- Preheat your oven to 375°F (190°C).
- Slice the pears in half and remove the cores.
- Wrap each pear half with a slice of turkey bacon.
- Place the wrapped pears on a baking sheet.
- Sprinkle brown sugar and cinnamon over the pears.
- Top with chopped walnuts.
- Bake for 25-30 minutes or until the bacon is crispy.
- Drizzle with honey before serving.
Notes
- For a richer flavor, use maple syrup instead of honey.
- Serve with vanilla ice cream for an extra treat.
Nutrition
- Serving Size: 1 pear half
- Calories: 180
- Sugar: 12g
- Sodium: 290mg
- Fat: 8g
- Saturated Fat: 2g
- Unsaturated Fat: 4g
- Trans Fat: 0g
- Carbohydrates: 24g
- Fiber: 4g
- Protein: 5g
- Cholesterol: 10mg
Keywords: Baked Pears, Turkey Bacon, Sweet and Savory, Pear Recipe